MyImunify User Documentation
Hosting Administrator
What is MyImunify (for hosting admin)?
It is a feature of Imunify360 included in the disabled-by-default state always. With MyImunify enabled, the Imunify360 service changes its protection behavior.
When enabled, Imunify360 will still protect the server against all known network attacks but with the malware cleanup disabled for users’ home directories and the Proactive Defense feature in the Log Mode by default.
In the MyImunify Protection disabled mode, Imunify360 will still scan users' directories, show found malware inside the UI, and also notify users about the detected malware if possible, proposing to purchase MyImunify protection via the hosting company billing system.
Prerequisites
- Imunify360
- CloudLinux OS Shared Pro
- WHMCS
- CloudLinuxAdvantages WHMCS plugin needs to be installed
What features will be enabled/disabled when I turn MyImunify on?
When you enable the MyImunify feature on your server, you have to adjust your product plan to enable MyImunify protection for existing users. Otherwise, all the existing users on this server will have the protection disabled and no malware cleanup or Proactive Defense will be working until they purchase MyImunify individually. Please see how to enable MyImunify for existing users here.
The following features are present and fully functioning regardless of the MyImunify Status.
- Advanced firewall with cloud heuristics and artificial intelligence for detecting new threats and protecting all servers that run the software - capable of defending against brute force attacks, DoS attacks, and port scans.
- Intrusion Detection and Protection System - a comprehensive collection of “deny” policy rules for blocking all known attacks.
- Patch Management - rebootless Secure Kernel powered by KernelCare keeps the server secure by automatically patching kernels without having to reboot the server.
- Website Reputation Monitoring - analyzing if websites or IPs are blocked by any blacklists and notifying if they are.
The features whose behavior is changed when MyImunify is enabled.
Malware Scanning - automatic scanning of file systems for malware injection and cleaning up infected files.
- When MyImunify is enabled on the server, Imunify360 will continue to scan the user’s home directories finding malware scripts and viruses, however, users with MyImunify Protection Disabled will not be able to clean up files using Imunify360. They will either need to clean up files themselves or purchase complete protection from the hosting company.
- At the same time, a hosting administrator still be able to clean up files if needed.
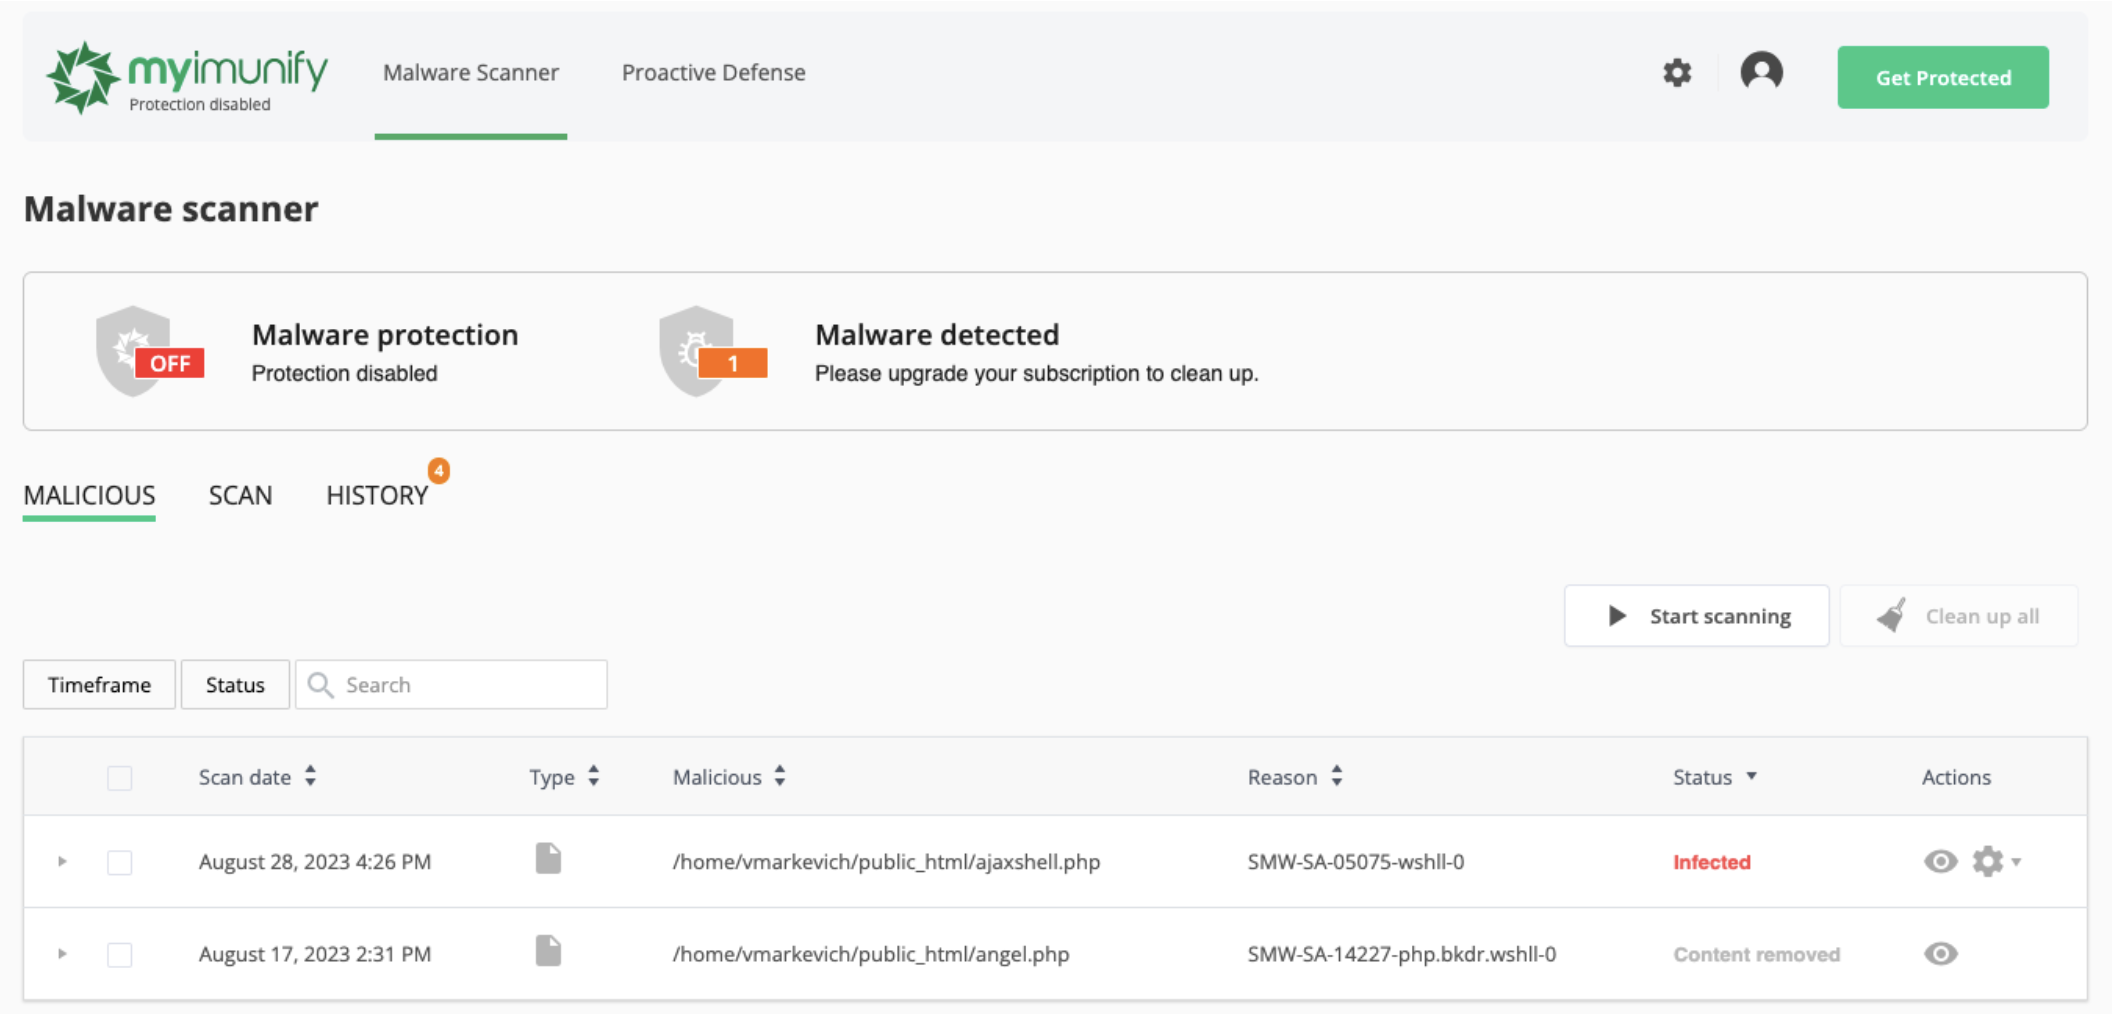
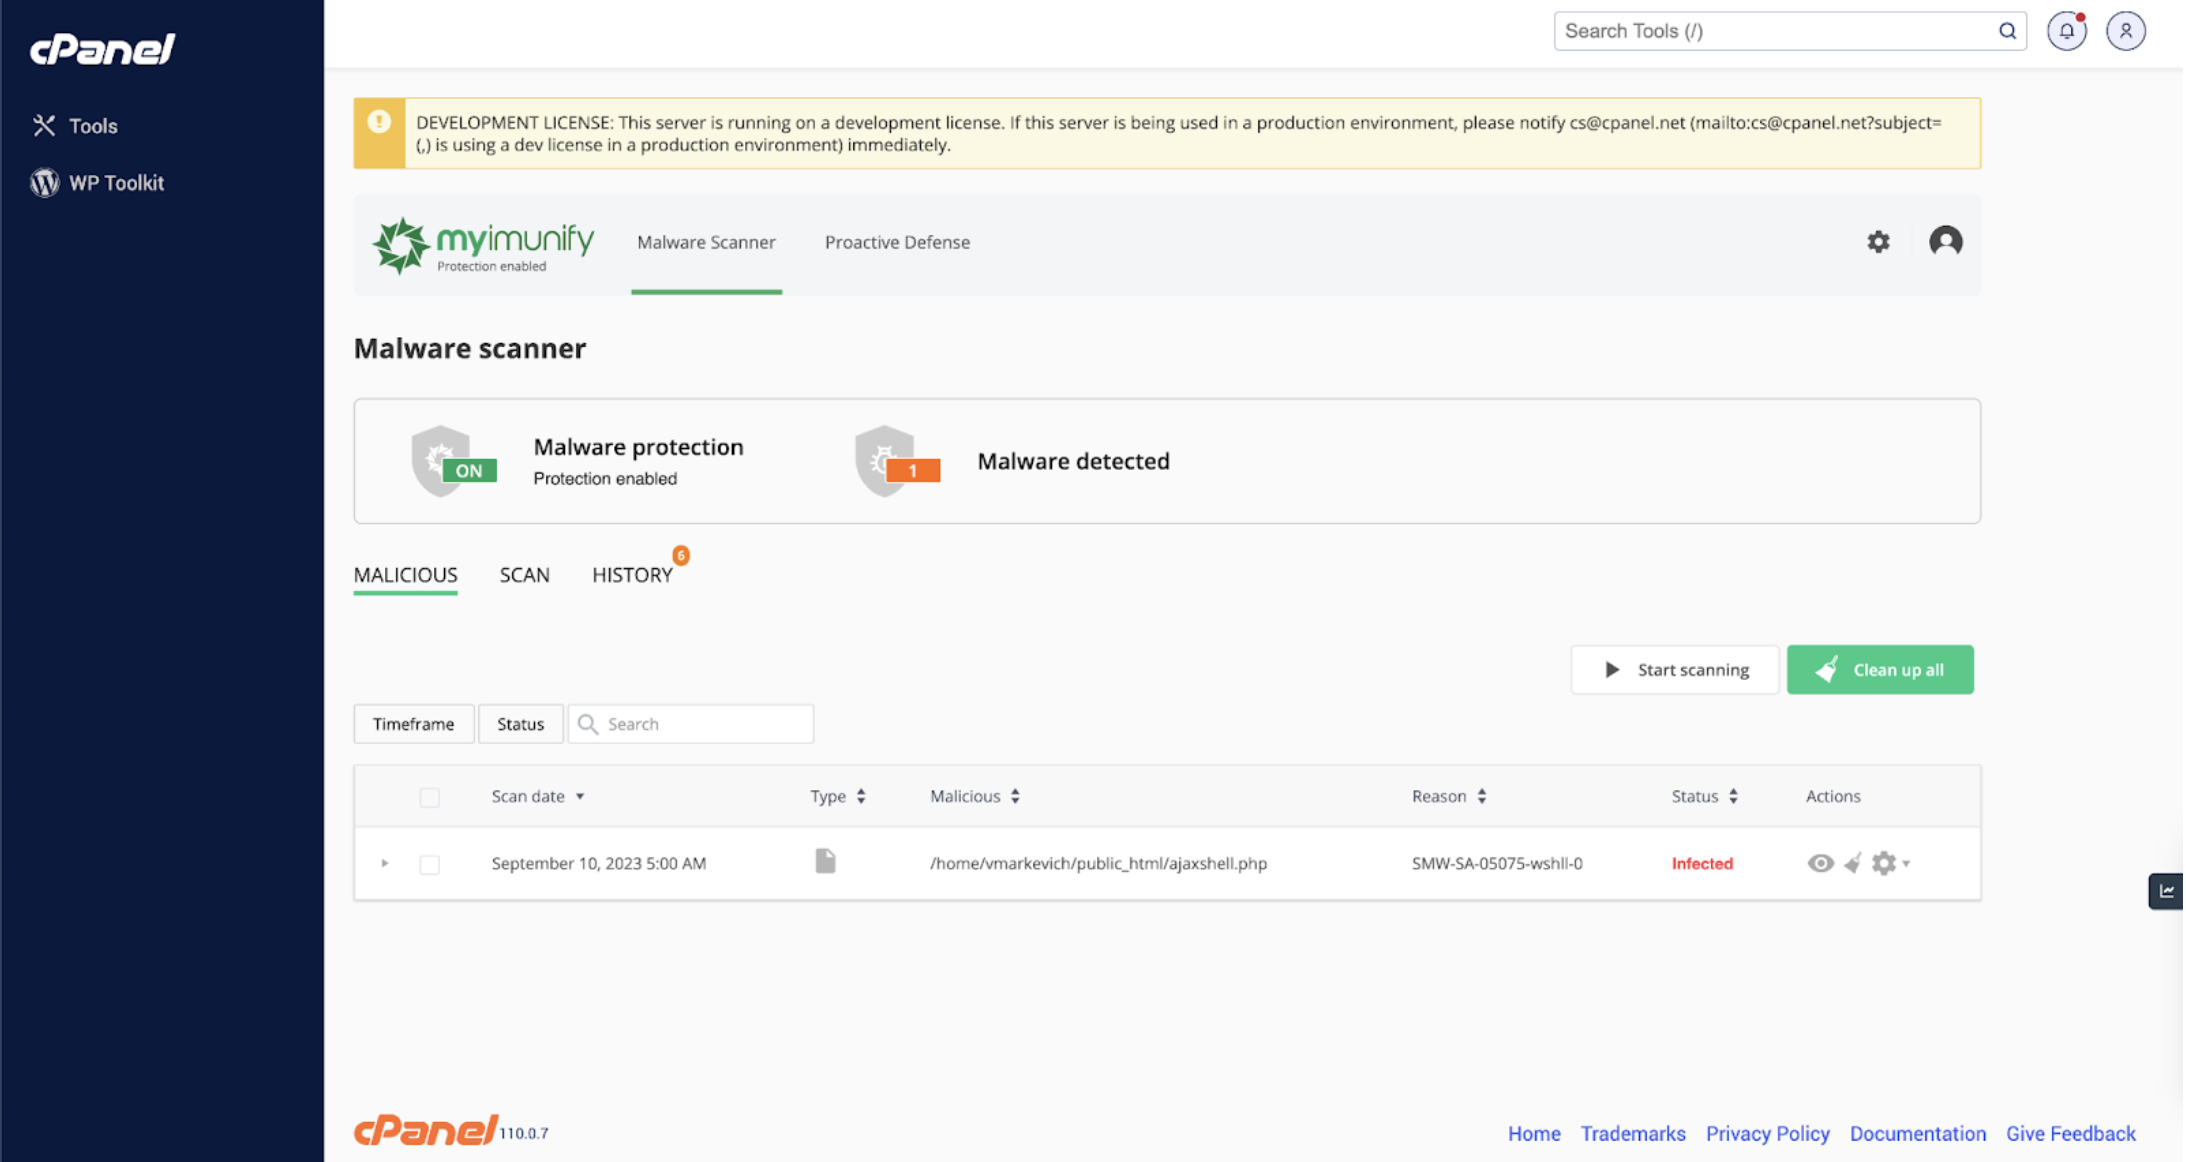
Account owner's UI when Protection is Disabled (Malicious Tab):
Proactive Defense - Proactive Defense protects websites running PHP, against zero-day attacks by blocking potentially malicious executions automatically and with zero latency.
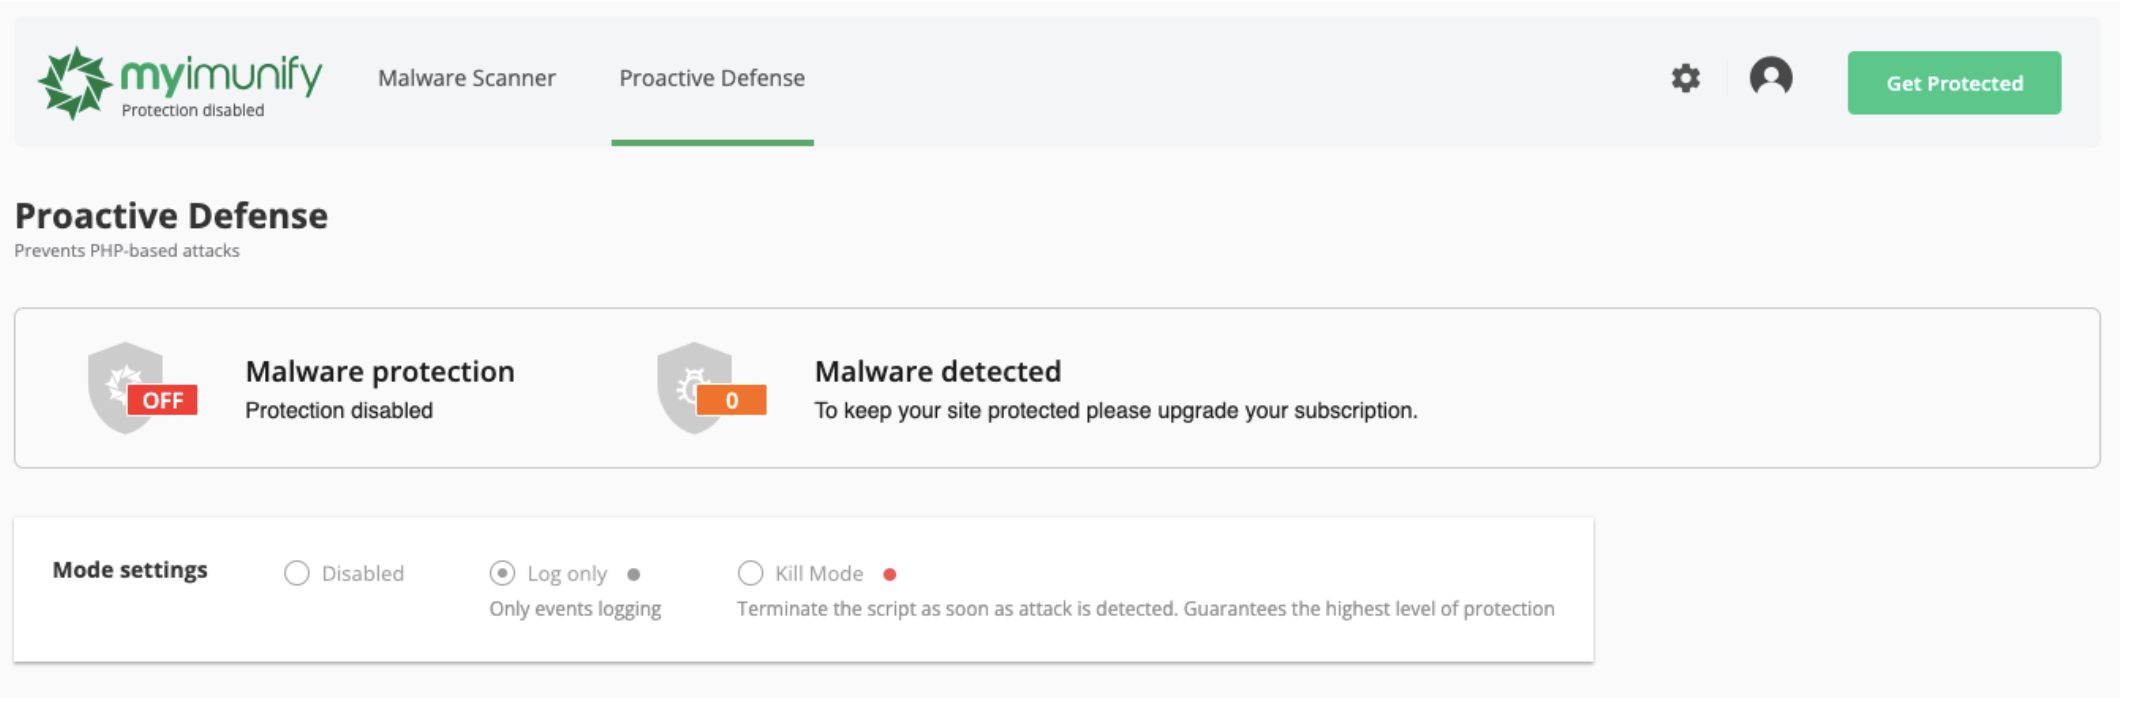
- When MyImunify is enabled, Proactive Defense will Log only suspicious events for all the users who haven’t yet had MyImunify Protection Enabled mode.
- Once MyImunify is enabled, Proactive Defense will automatically enabled into Kill Mode unless it is disabled on the server.
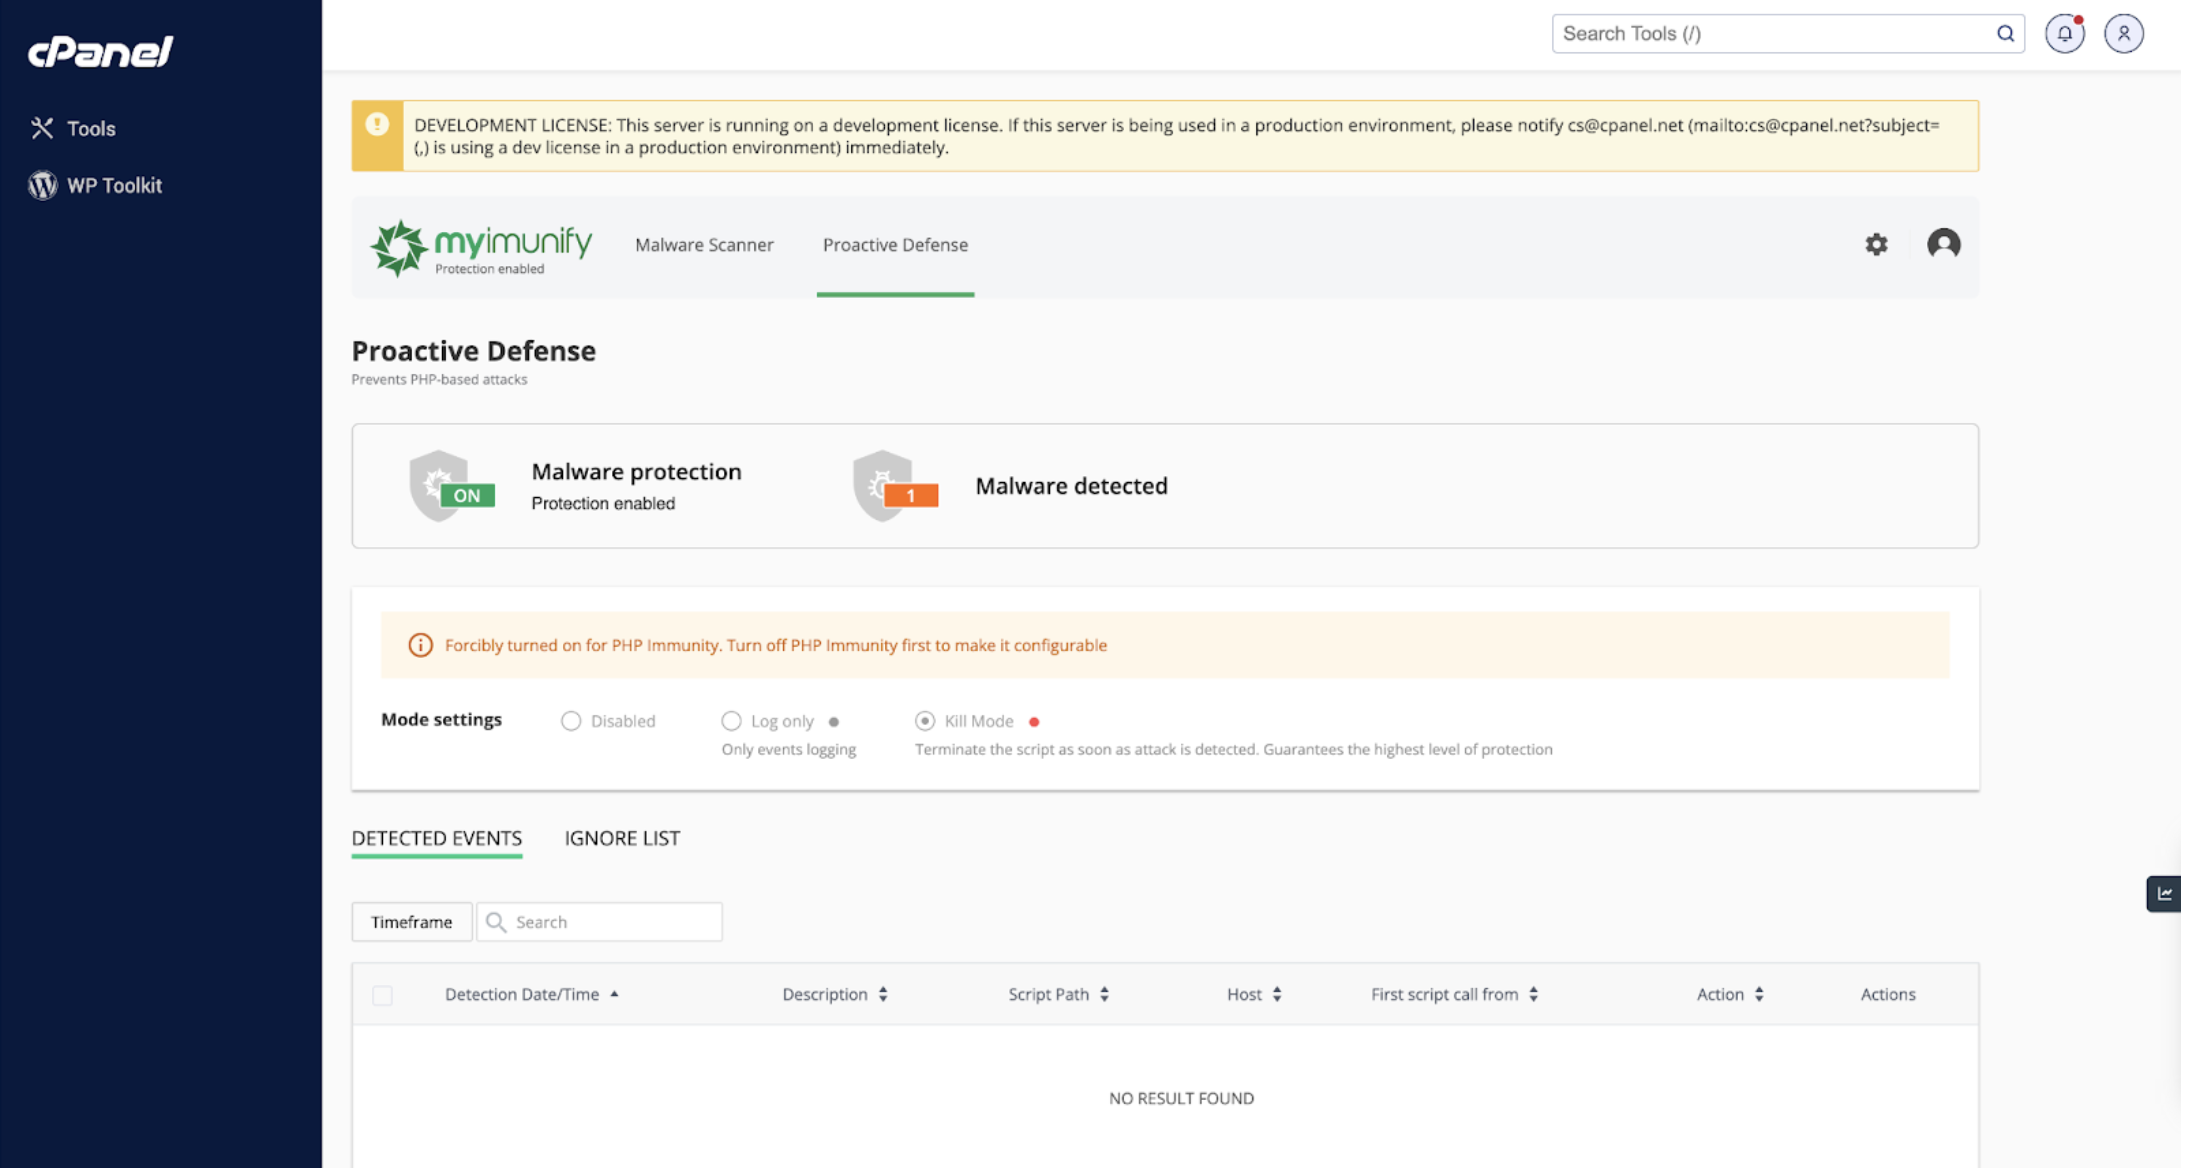
Account’s owner’s UI when Protection is Disabled (Proactive Defence tab):
How to enable MyImunify
Configuring the billing system (WHMCS) side
Install the CloudLinux Advantages plugin if you don’t have it yet. Once installed check presence in WHMCS -> Addons menu.

Don’t forget to add your server under WHMCS management: System -> Settings -> Servers -> Add New Server. Refer to https://docs.whmcs.com/Servers#Add_a_Server.
Adding a new Configurable option to a hosting plan
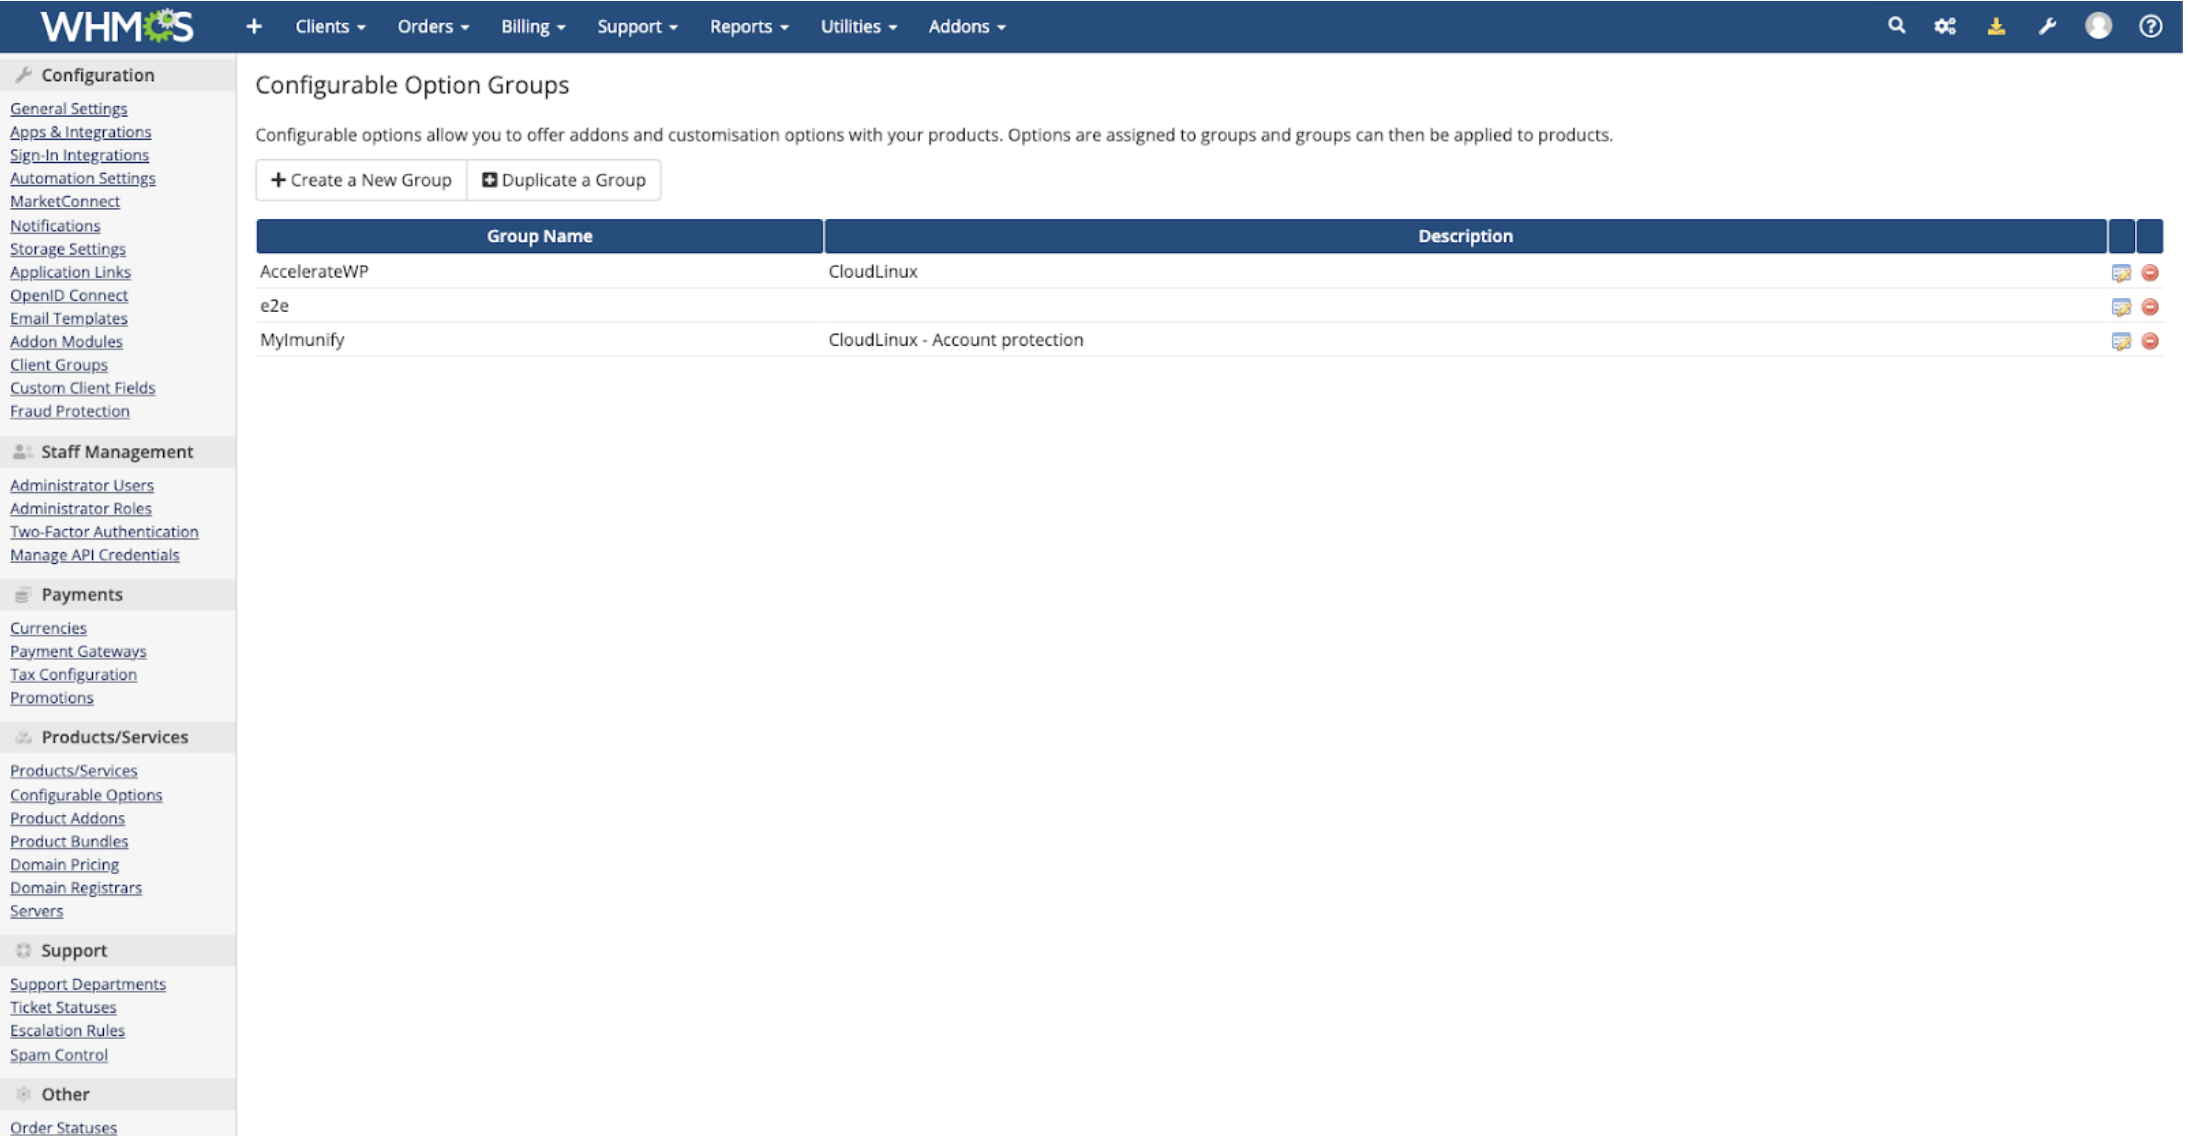
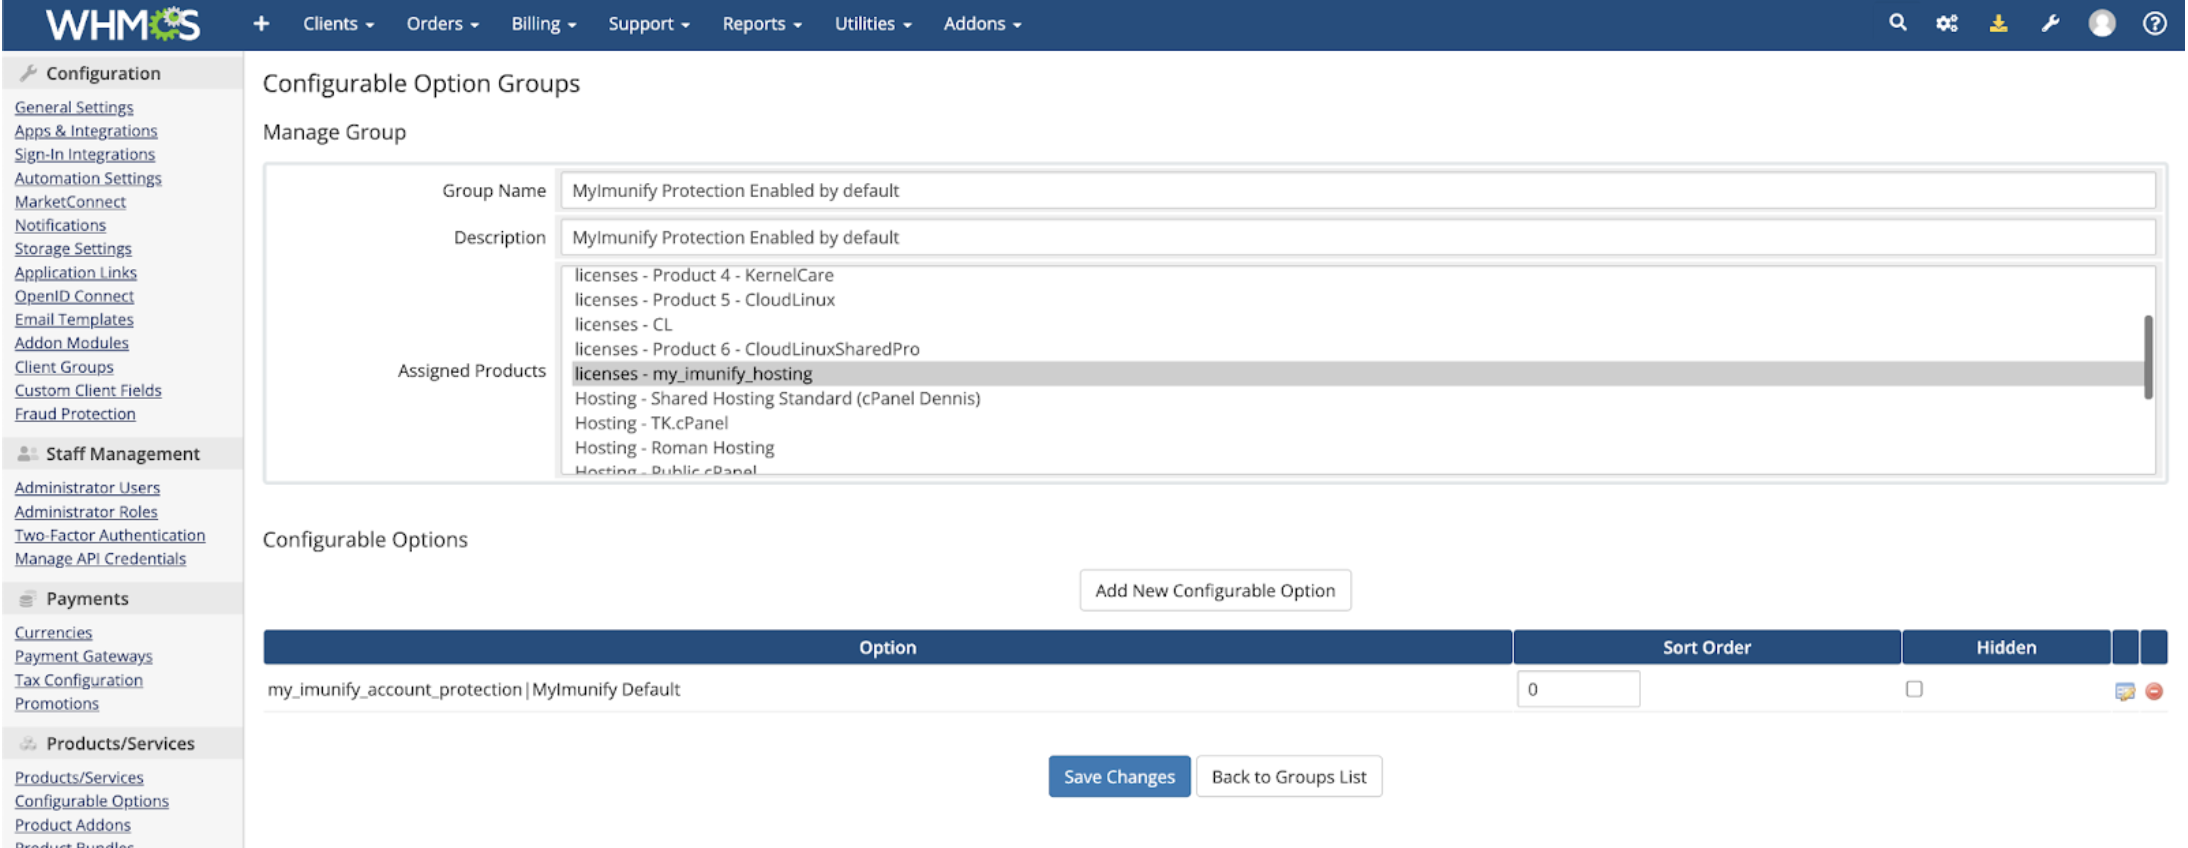
- Go to WHMCS System Settings -> Configurable Options, select the MyImunify Group, and edit it.
- my_imunify_hosting needs to be assigned to the hosting plans. Select linceses - my_imunify_hosting and your hosting configuration together in the Assiged Product list (
Shift+click).
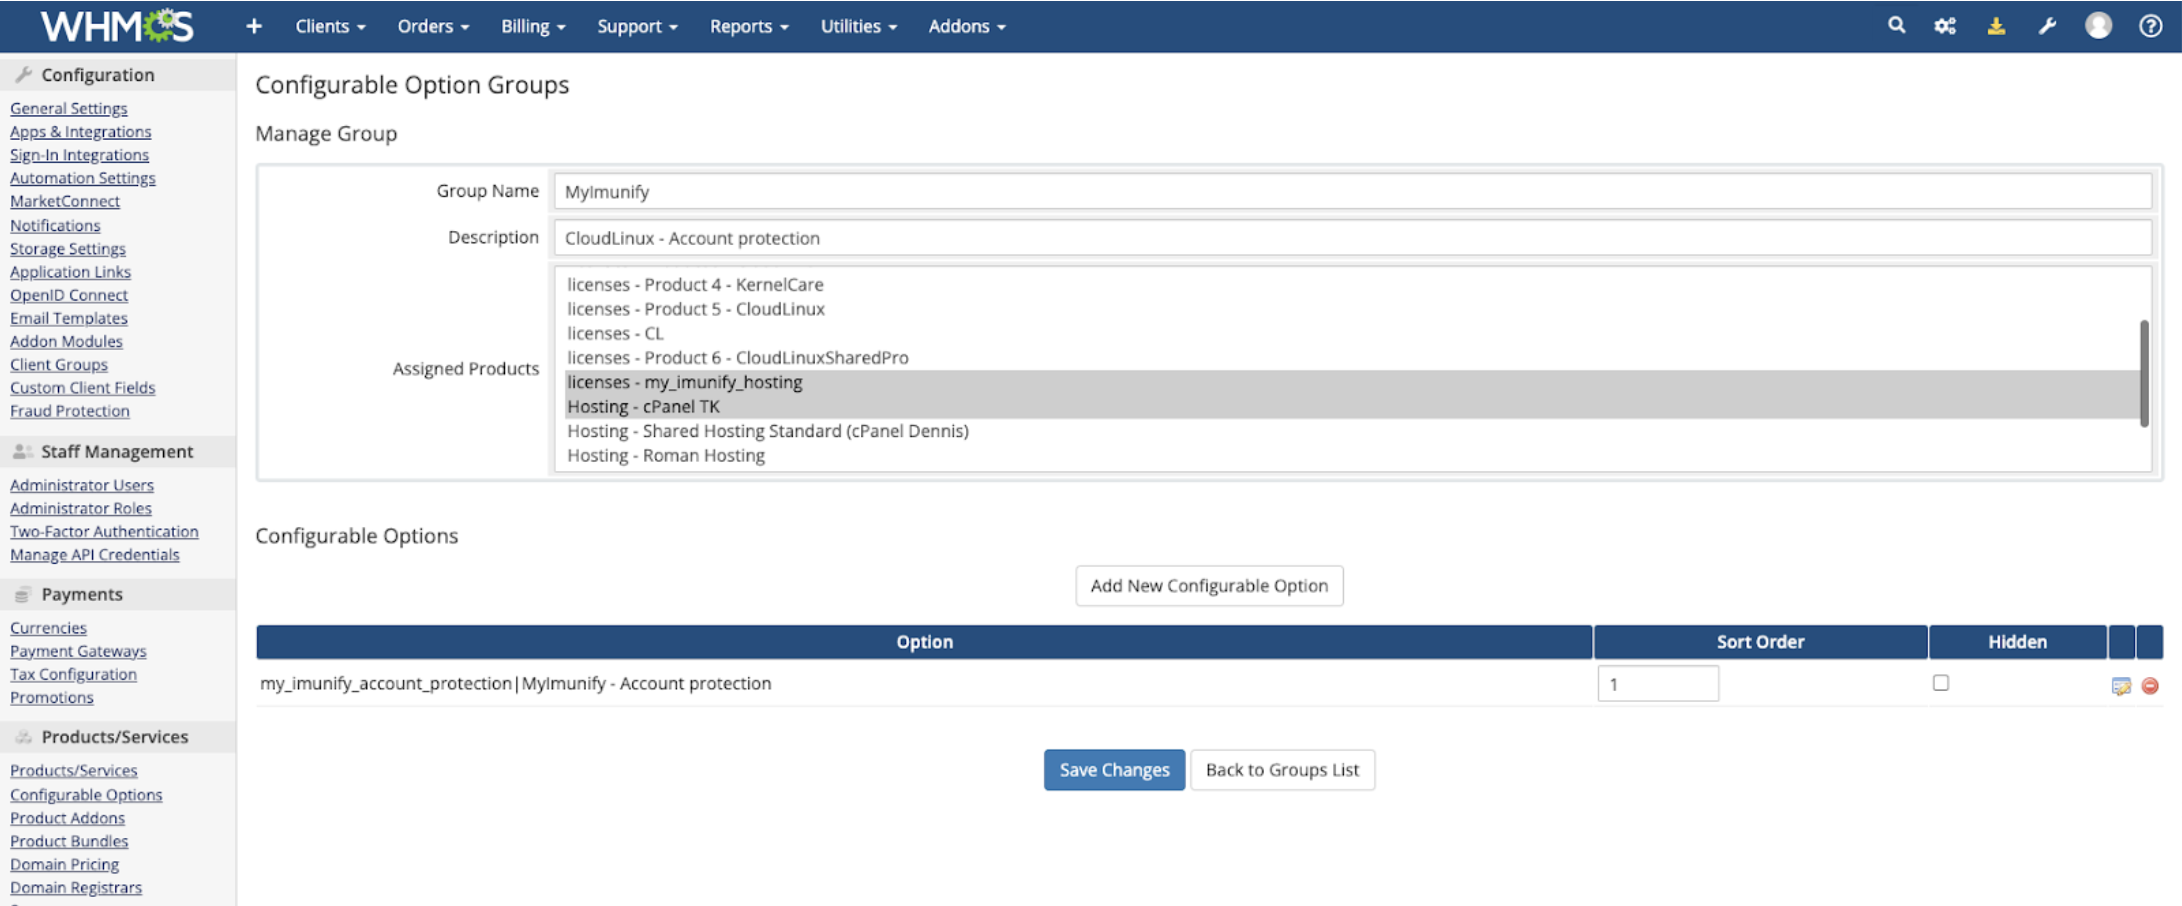
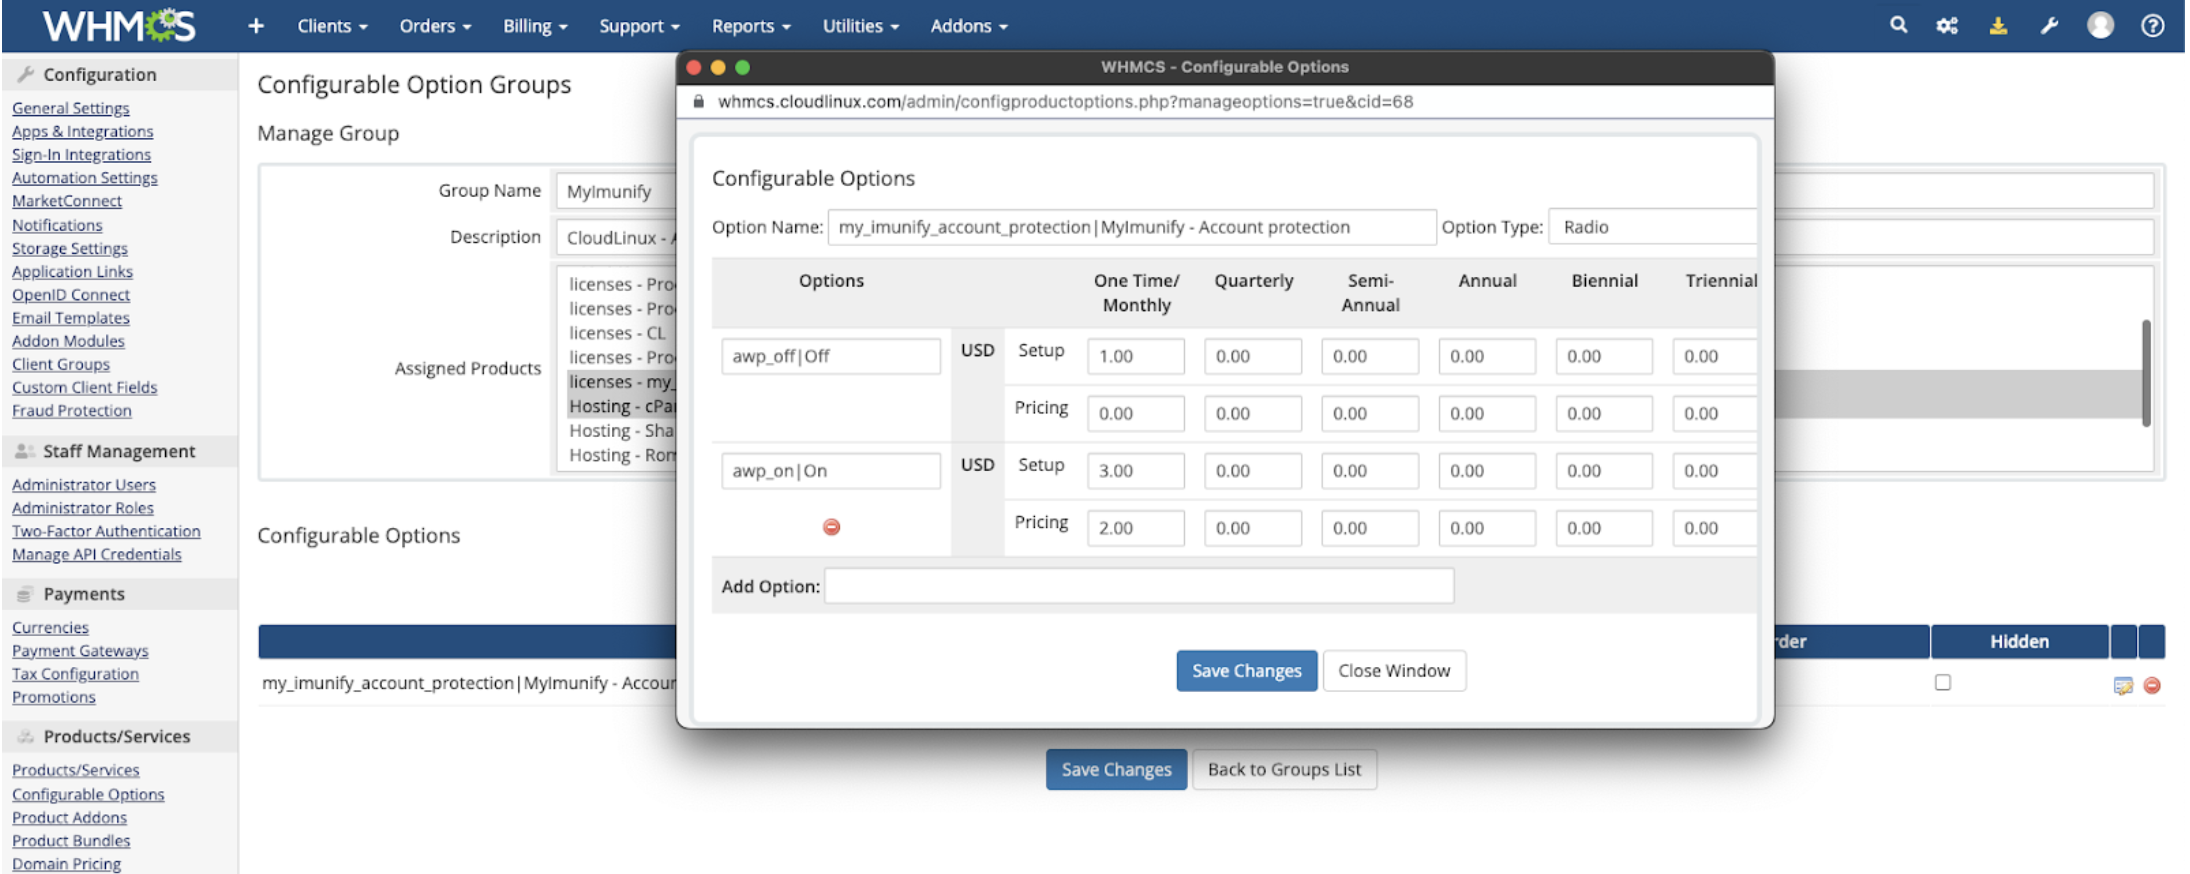
- Edit the price for the configurable option MyImunify – Account Protection. For more info, visit https://docs.whmcs.com/Configurable_Options.
Enabling MyImunify for existing users by default
In case a hosting company wants to enable MyImunify on a server that already has Imunify360 installed avoid existing users getting no protection users, but at the same time make new users purchase protection on demand, then WHMCS administrator will need to configure two different hosting plans:
- The first plan will have MyImunify enabled by default at no cost, so existing users will see no change in the protection.
- The second plan will have the MyImunify configurable option off by default, so it can be assigned to new users to allow them to purchase it on demand.
Here is how to configure an existing hosting plan by WHMCS administrator to enable MyImunify Protection Enabled at no additional cost.
- Go to Settings -> Configurable Options Groups -> Create New Group:
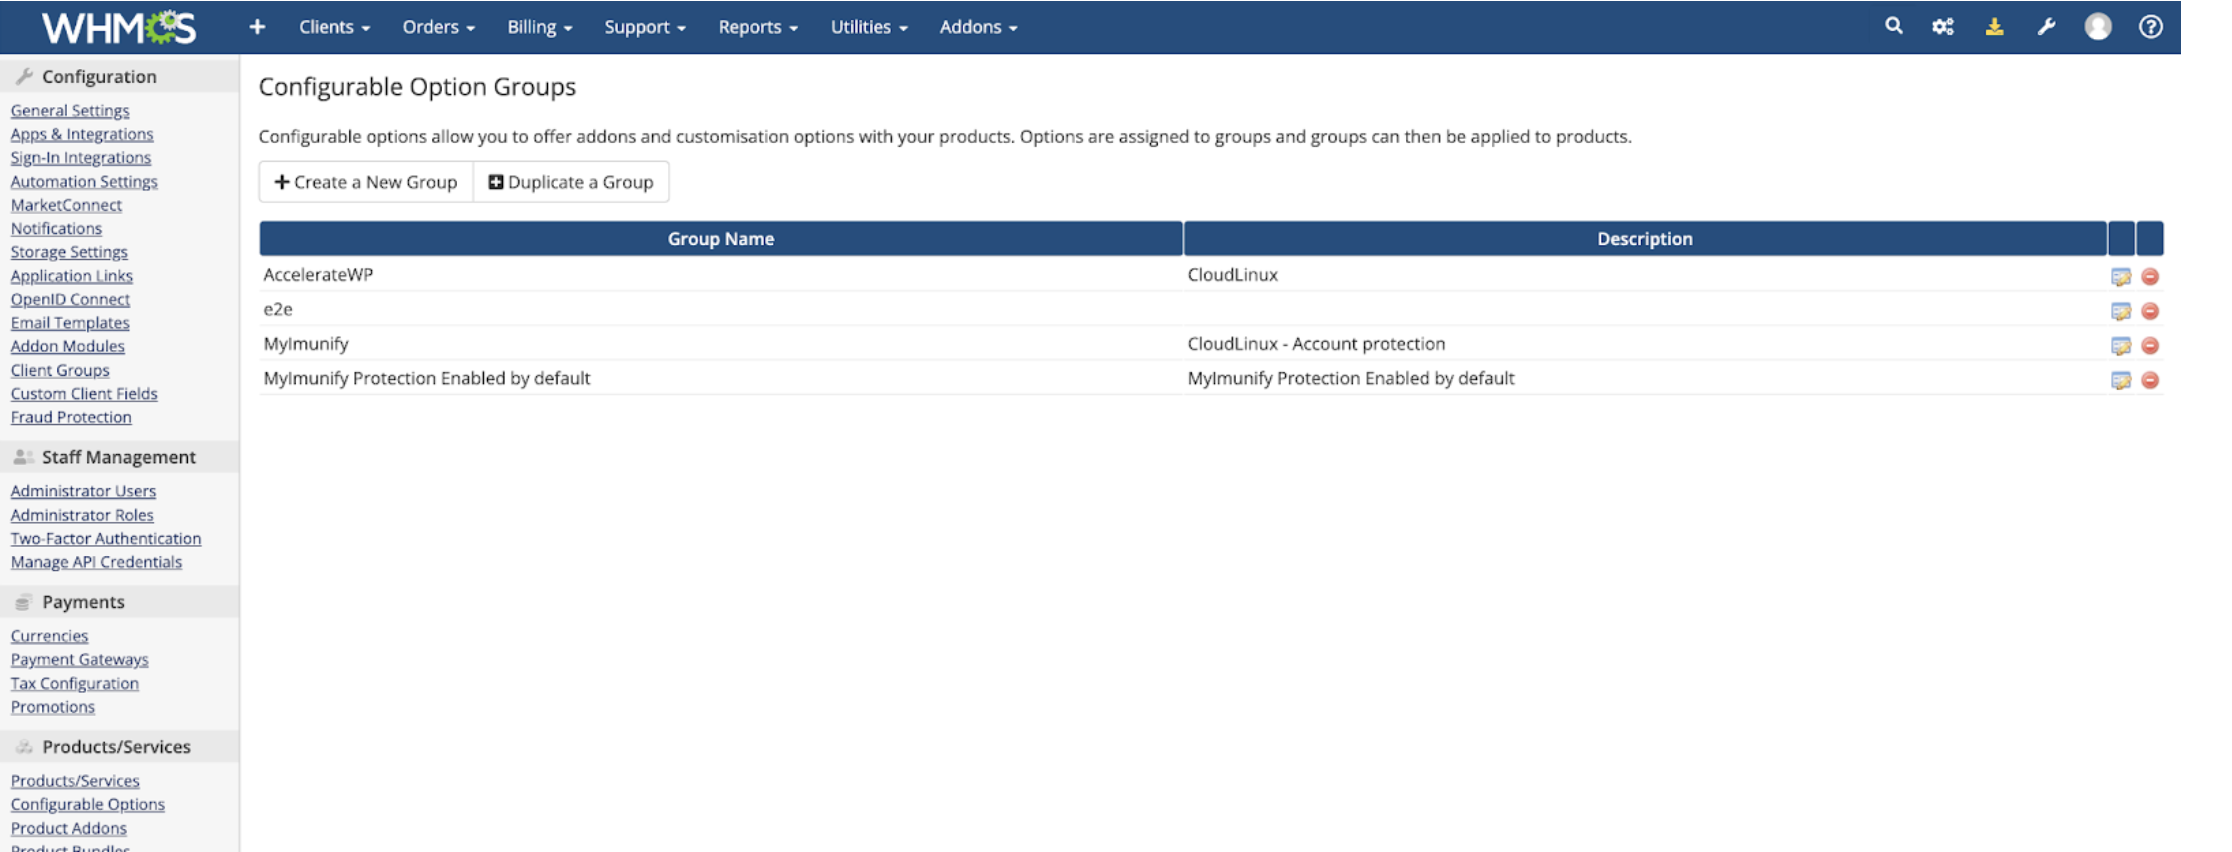
- Create a new group with a distinct name and assign it to your existing product/plan:
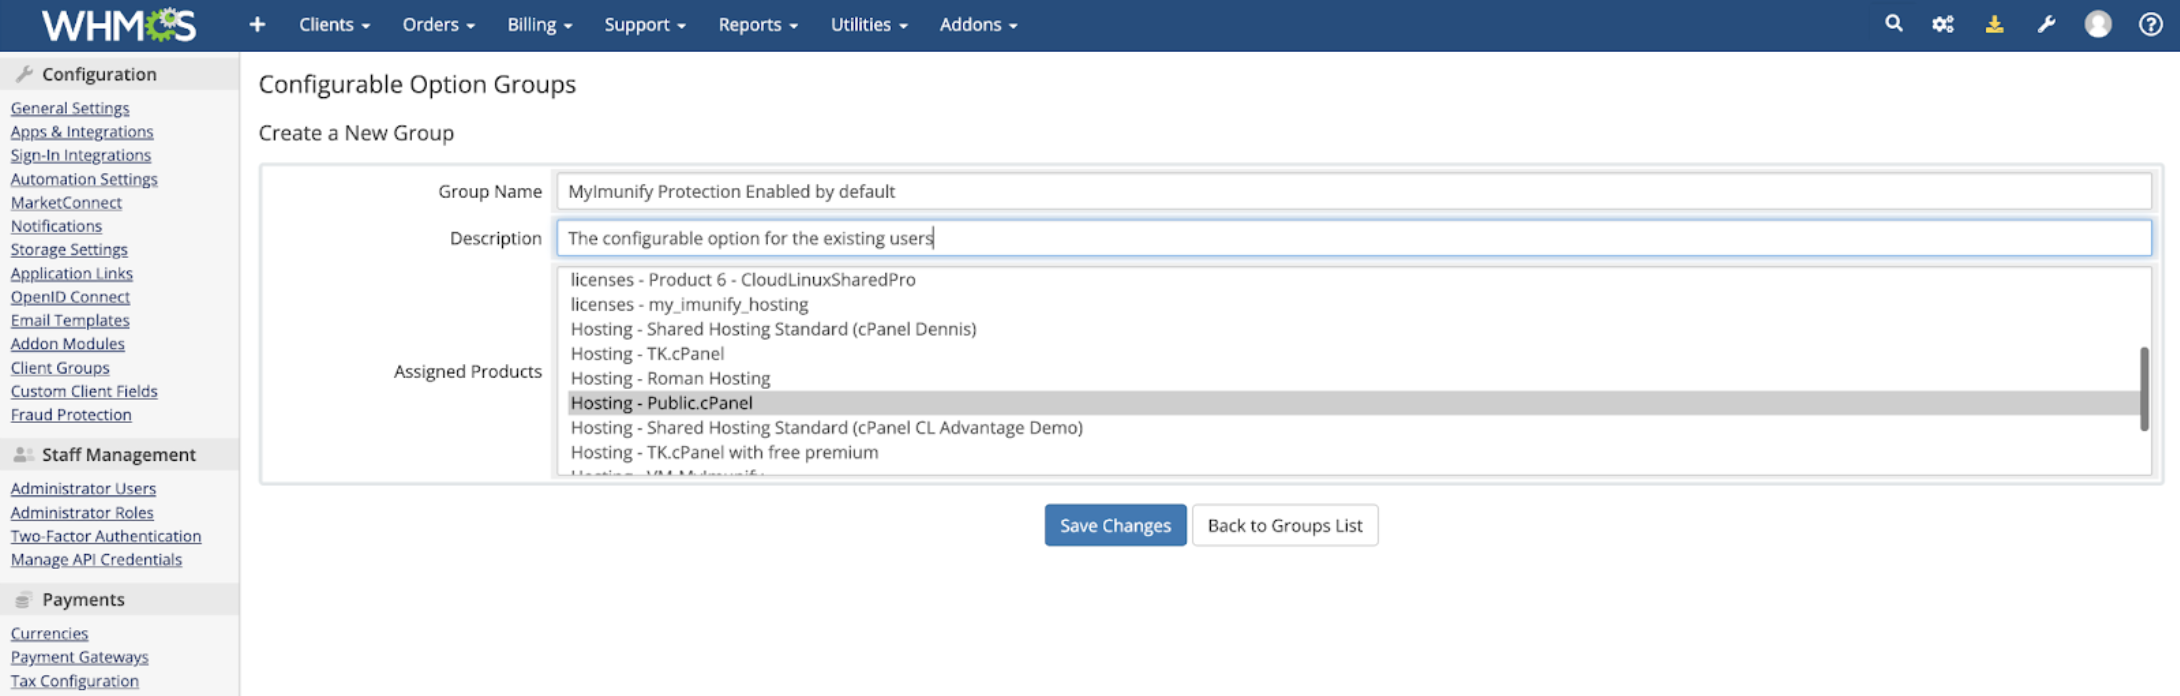
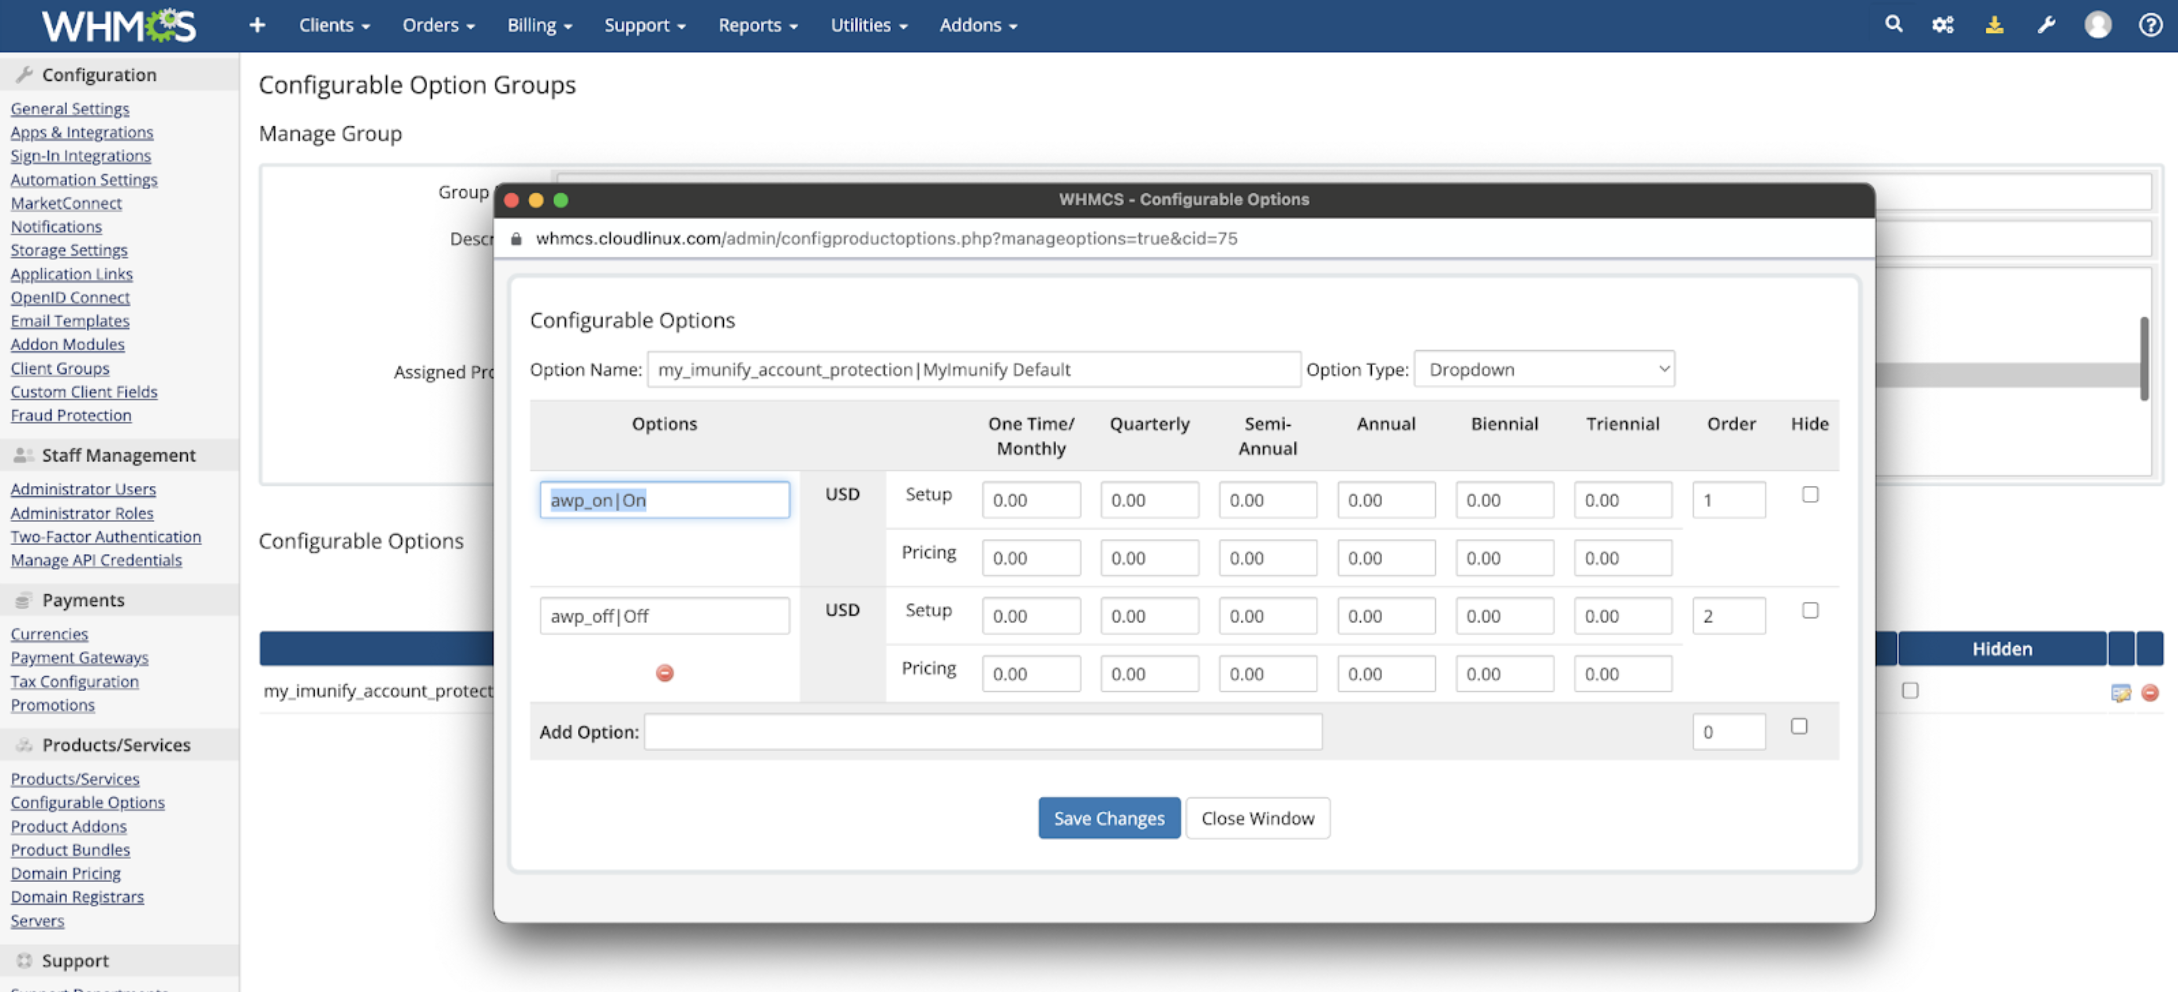
- Add a new configurable option to the group and press “Add New Configurable Option”:
Fill in the option name field. It is important for the option to start with
my_imunify_account_protection|(don’t forget|at the end).Then add the option
awp_on|On. Useawp_on|as a prefix, the rest is the text that a user will see.- To avoid inflicting additional costs, the price line needs to be filled with 0.00. The Order value must be set to “1”.
- It is also possible to add an
awp_off|option here to allow the users to disable protection. In this case, the Order field must have a value “2”.
Confirming the changes
To check if the Configurable option is assigned to the hosting plan, see “Settings -> Product Services -> Select your hosting plan -> Configurable options”. Make sure that the created Configurable Option is assigned to the needed hosting plan.
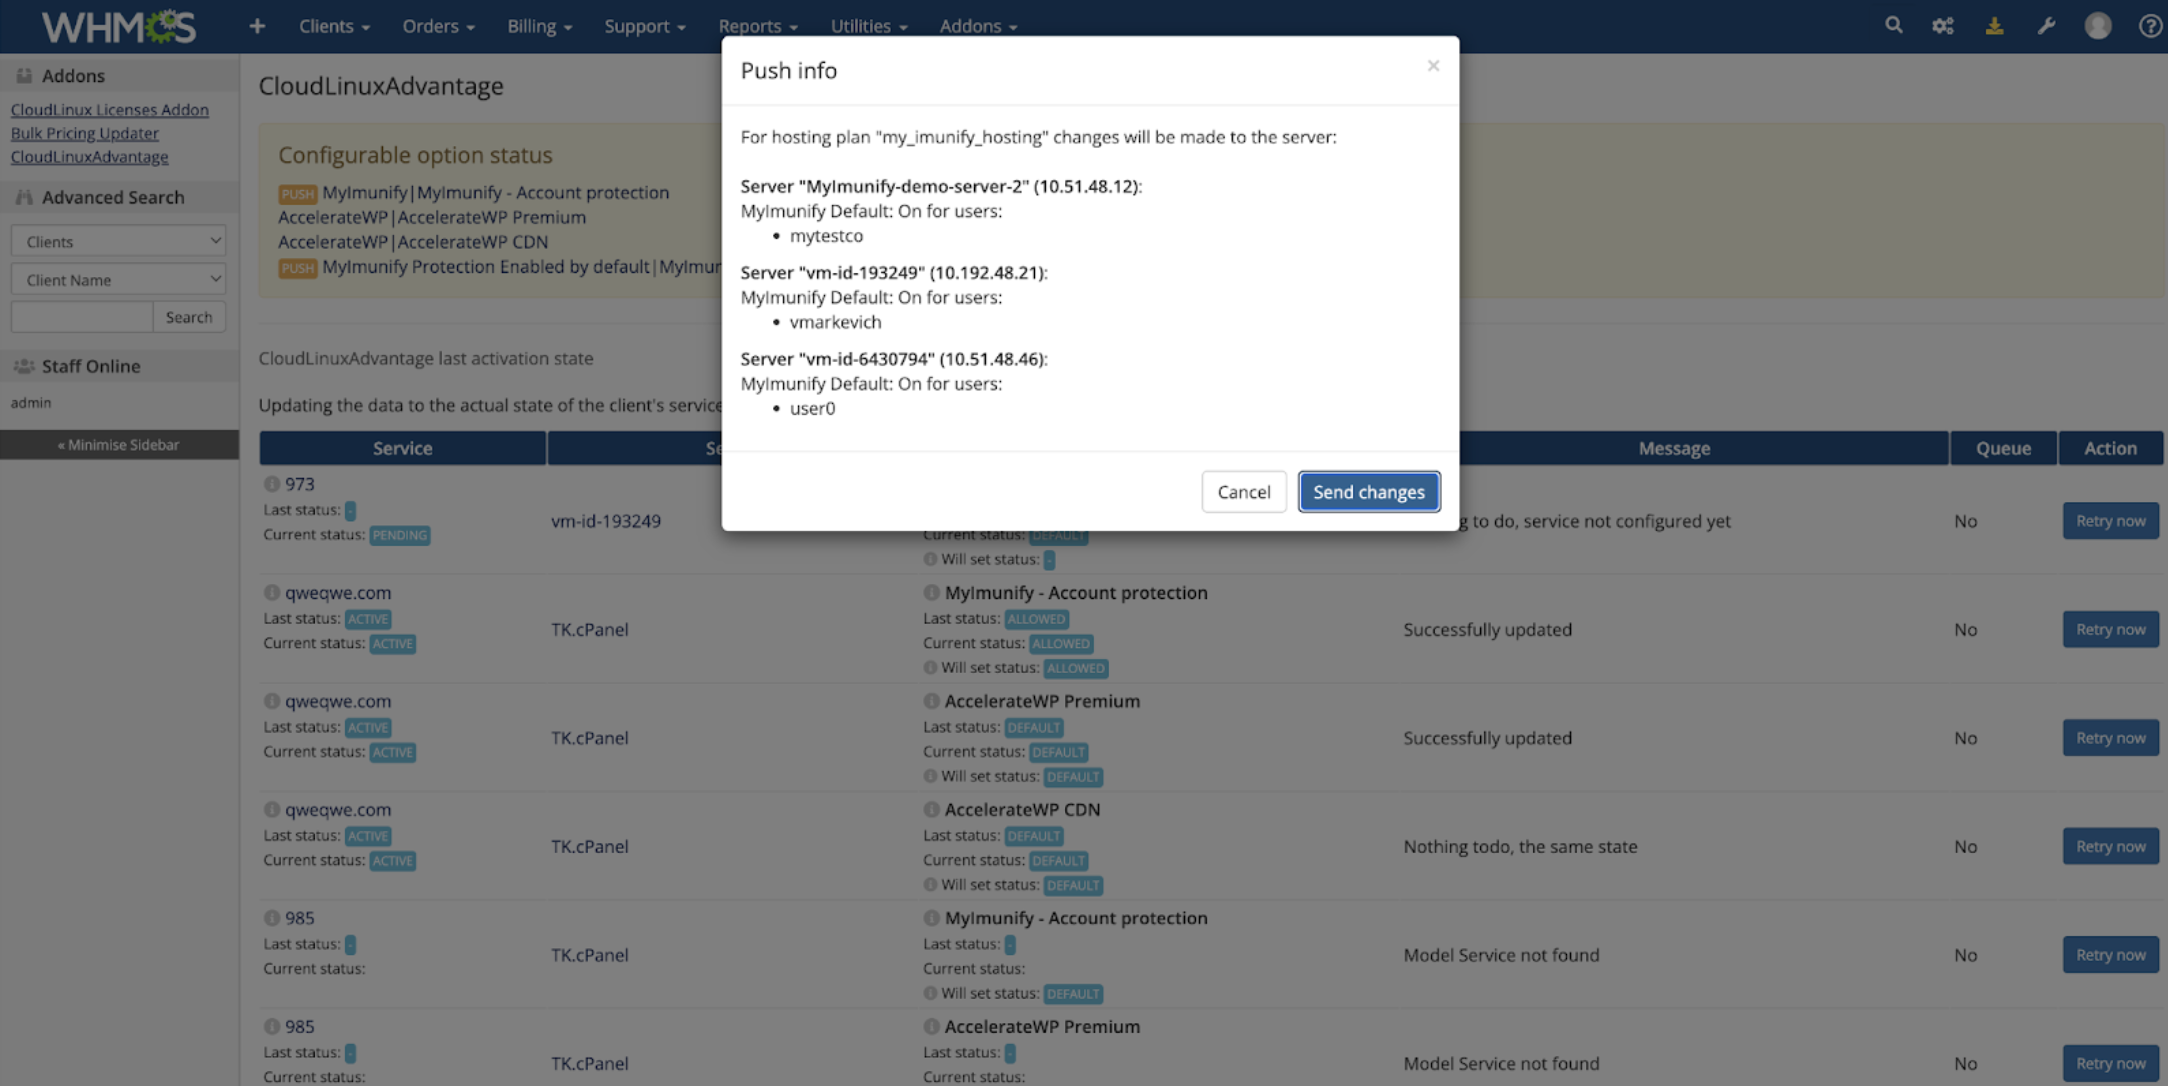
Once it is done, it is required to sync changes to the existing servers. In order to do so select “Addons -> CloudLinuxAdvantages”

There is an area called Configurable option status. Your new option will appear here, preceded by the "PUSH" button. The button needs to be pressed in order to sync changes with the existing hosting plan to your servers. Once pressed it will show the list of servers and users where the "Configurable option" change will be propagated. Press “Send Changes” if everything is ok.
Now you have to configure your new hosting plan for the users who will need to purchase protection on demand.
Configuring the Imunify360 side
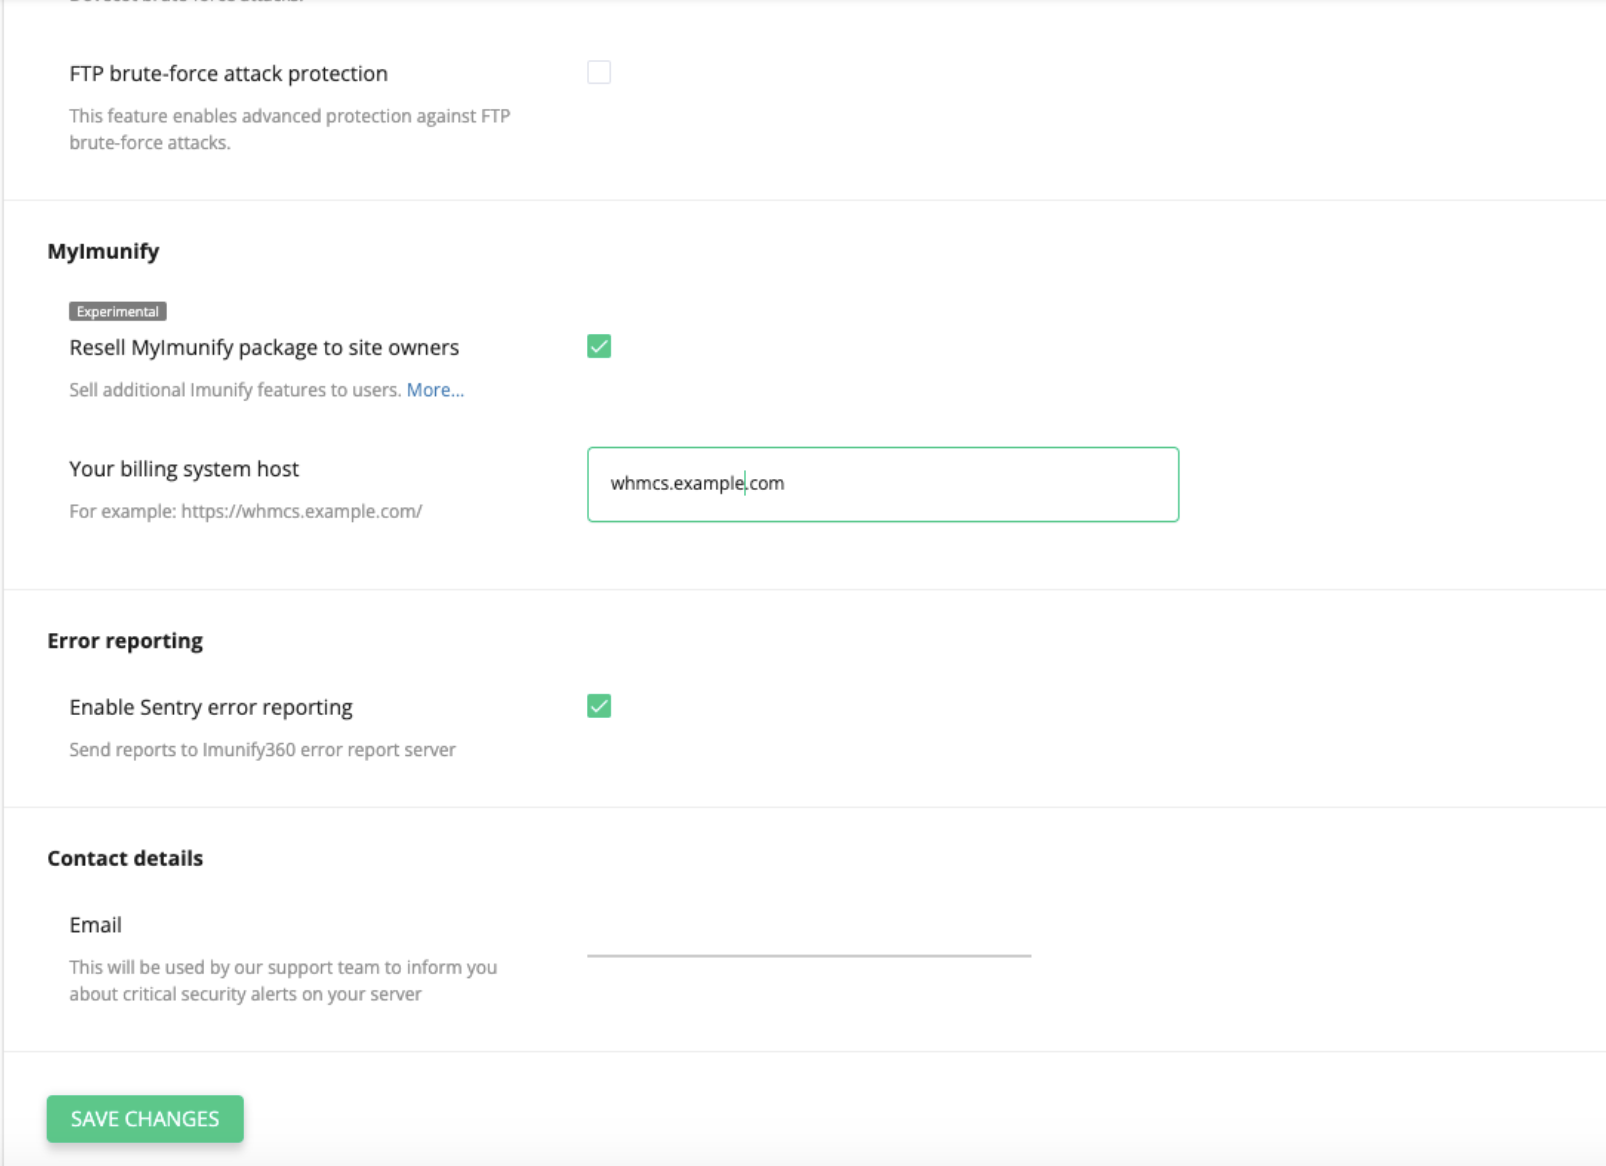
- Configuration of MyImunify on the Imunify360 side is pretty easy. Navigate to the Imunify360 -> Settings -> General -> MyImunify section.
- Click “Resell MyImunify package to site owners” and specify the billing system (WHMCS) hostname. If your system is running on the port other than standard HTTPS port (443), specify it as well e.g.
whmcs.example.com:8443. Don’t forget to hit theSave Changesbutton.
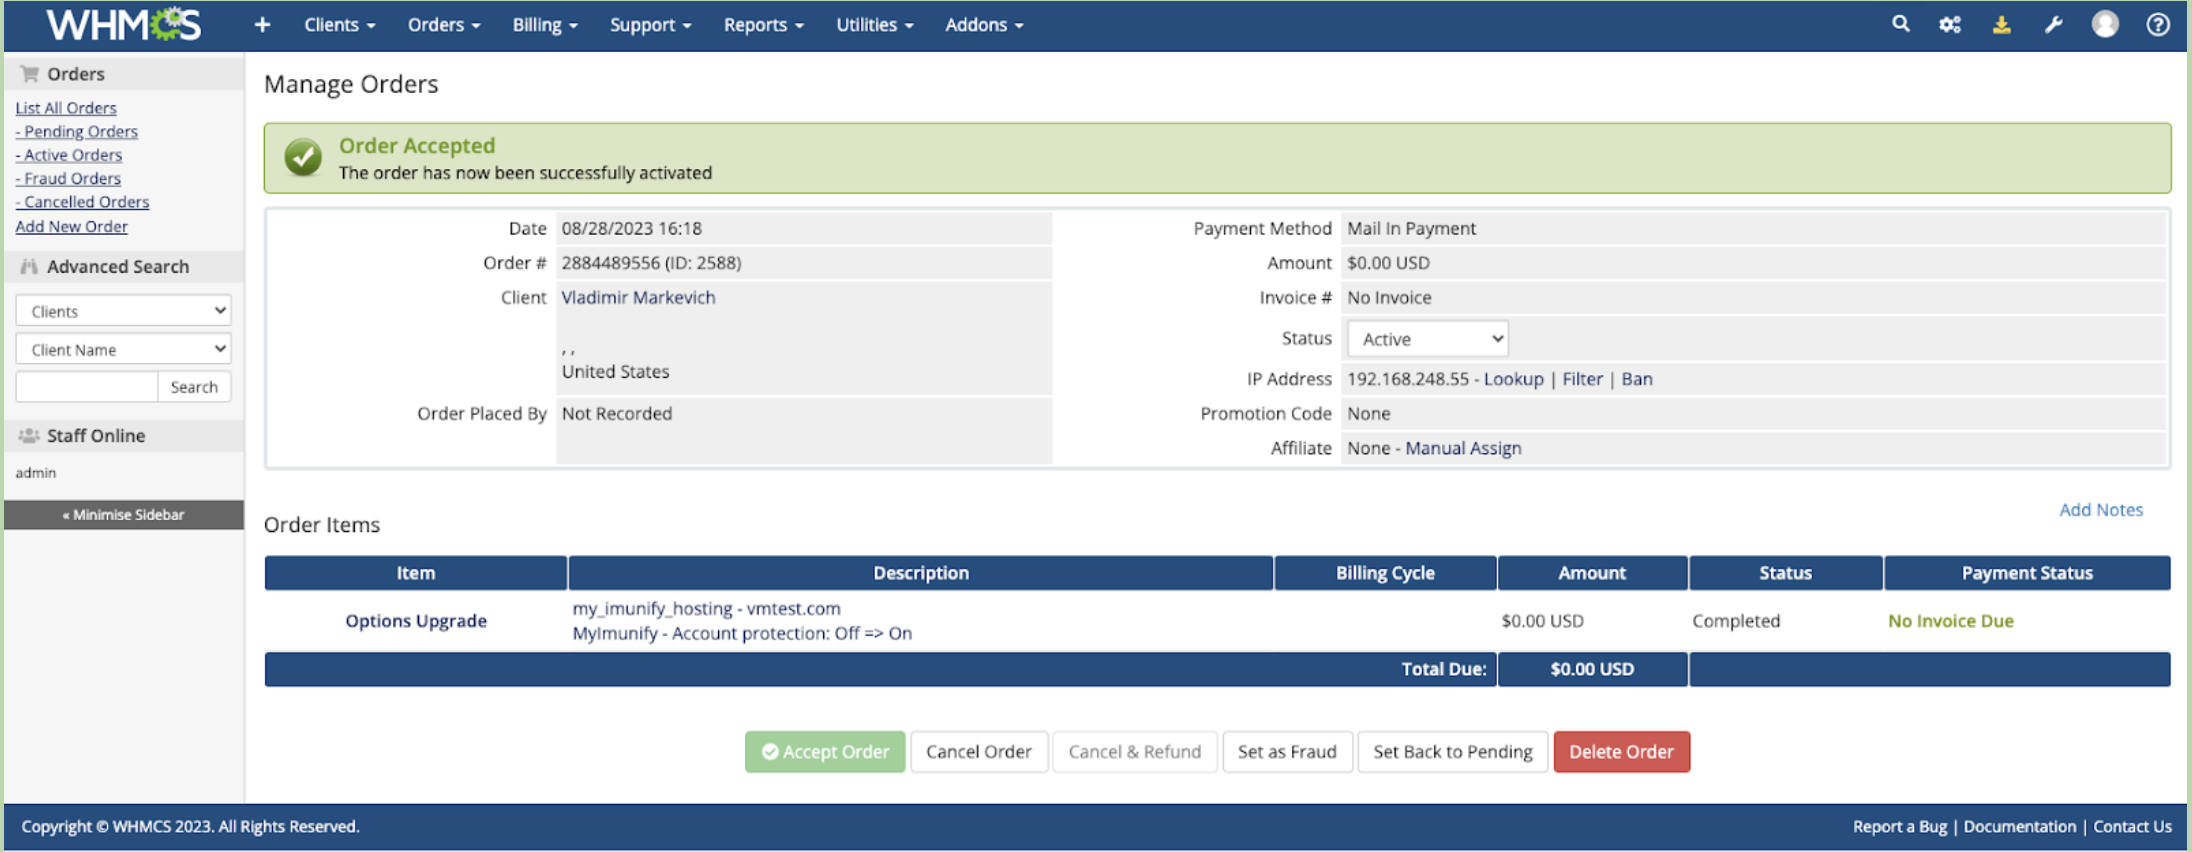
Approving Orders
By default, every purchase of a configurable option creates an order that needs to be accepted.
- Select Orders -> List Orders:

- Select pending orders and accept them.
Account Owner
What is MyImunify (for an account/site owner)?
MyImunify - your comprehensive web security solution. In today's digital landscape, the importance of robust web security cannot be understated. MyImunify provides an integrated solution for website owners keen on ensuring maximum protection. Here are the essentials of what MyImunify offers:
Automated Malware Management: MyImunify automatically scans file systems for traces of malware, swiftly identifying and cleaning infected files. This not only maintains the integrity of your website but also significantly reduces the administrative efforts required in manual malware detection and removal.
Proactive Defense: With a vast majority of websites running PHP, it becomes crucial to guard them against not just known threats, but also potential zero-day attacks. MyImunify's Proactive Defense feature is designed to achieve this by blocking potentially malicious executions in real time, ensuring your website operates securely without latency issues.
By integrating MyImunify, you equip your website with a cutting-edge protective layer that is both efficient and unobtrusive. It is a prudent choice for those prioritizing digital safety.
Where MyImunify is located?
- Log into your hosting account control panel (cPanel) and find Imunify360 in the Security section (or use a search tool for "Imunify360").
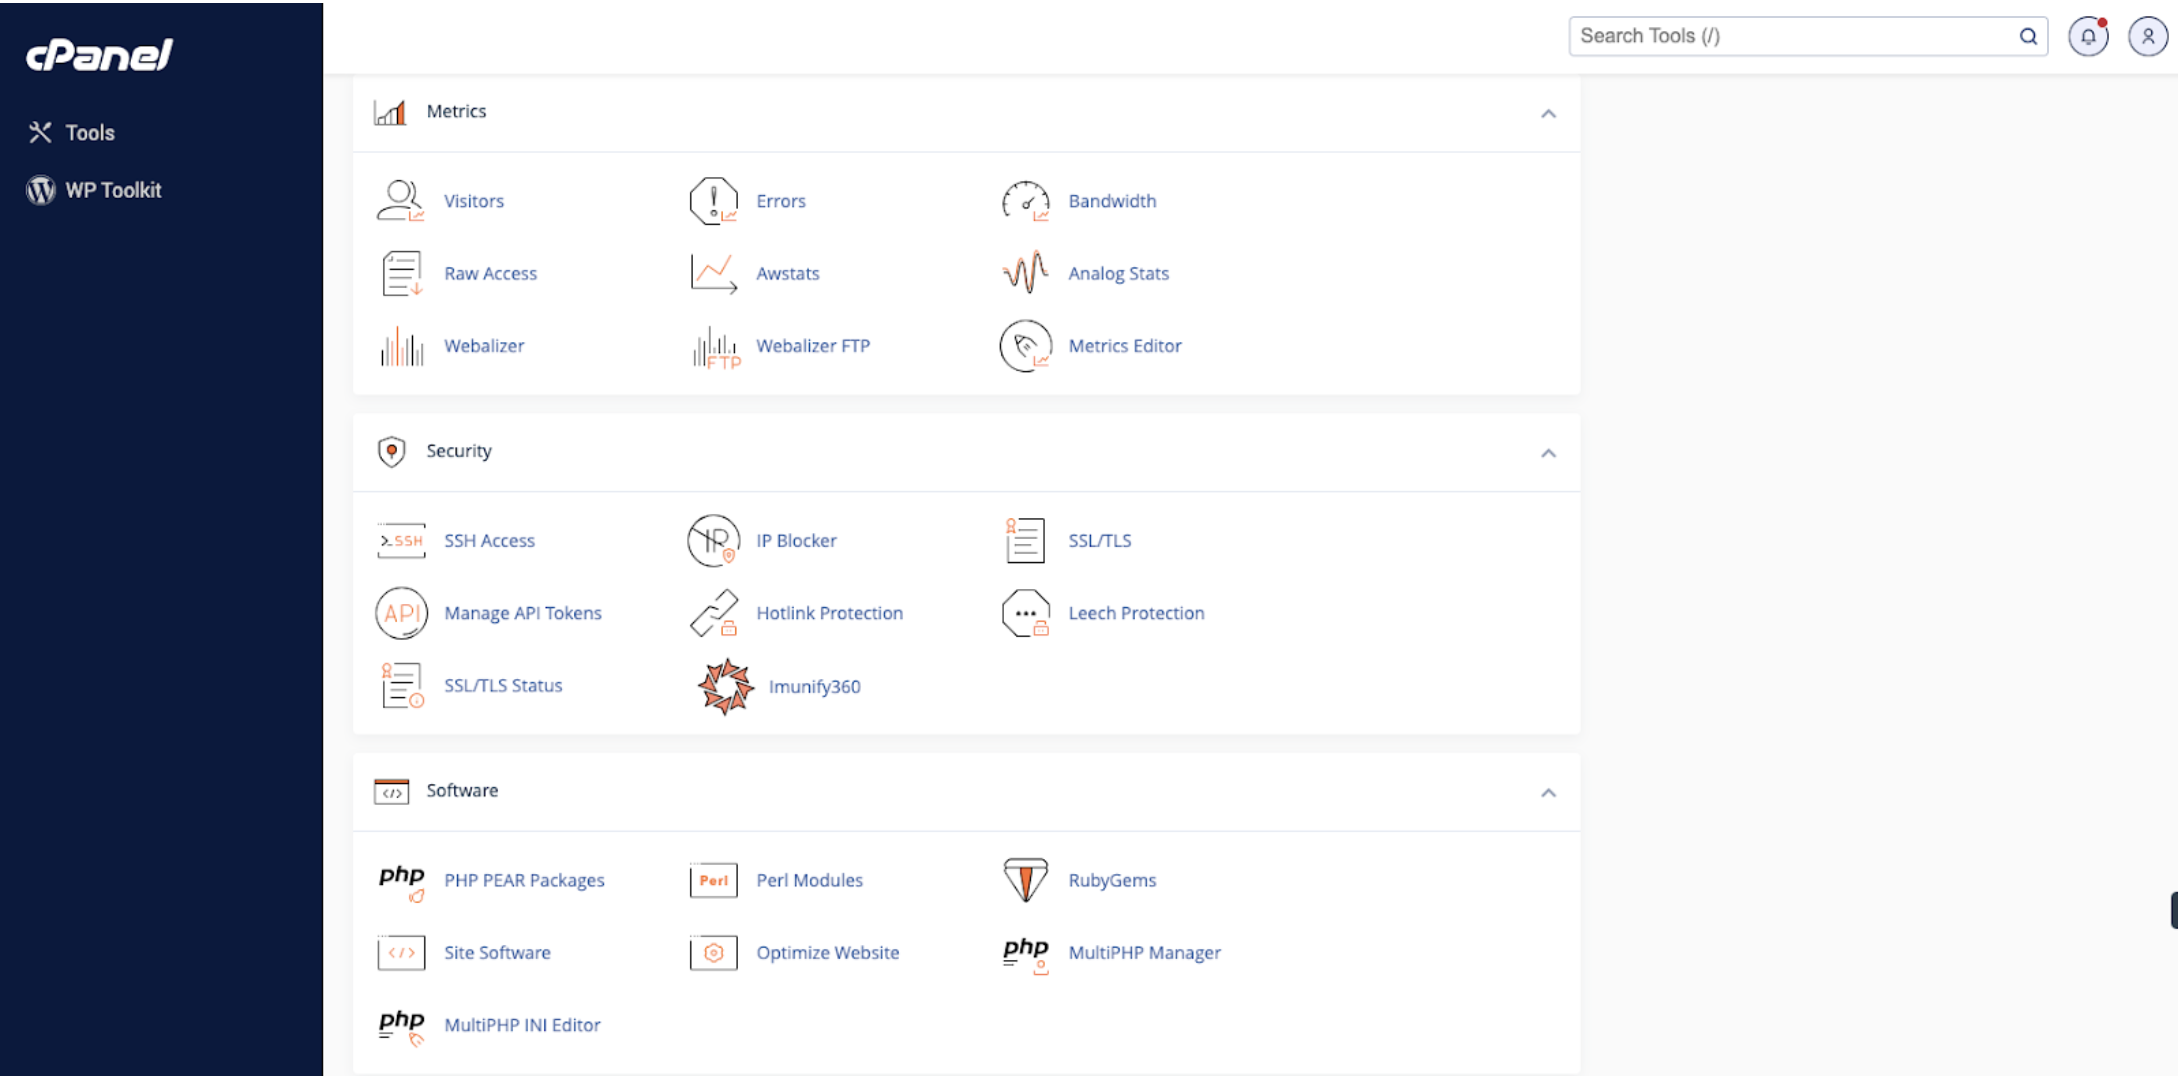
- Open Imunify360.

On the screenshot, you can see an example of an account with malware detected.
MyImunify automatically scans the account’s home and website directories and finds malware and other suspicious files. Once malware is detected, it is time to remove it. Site administrators can either remove it manually or press the "Get Protected" button to enable MyImunify protection.
MyImunify Protection enabled mode
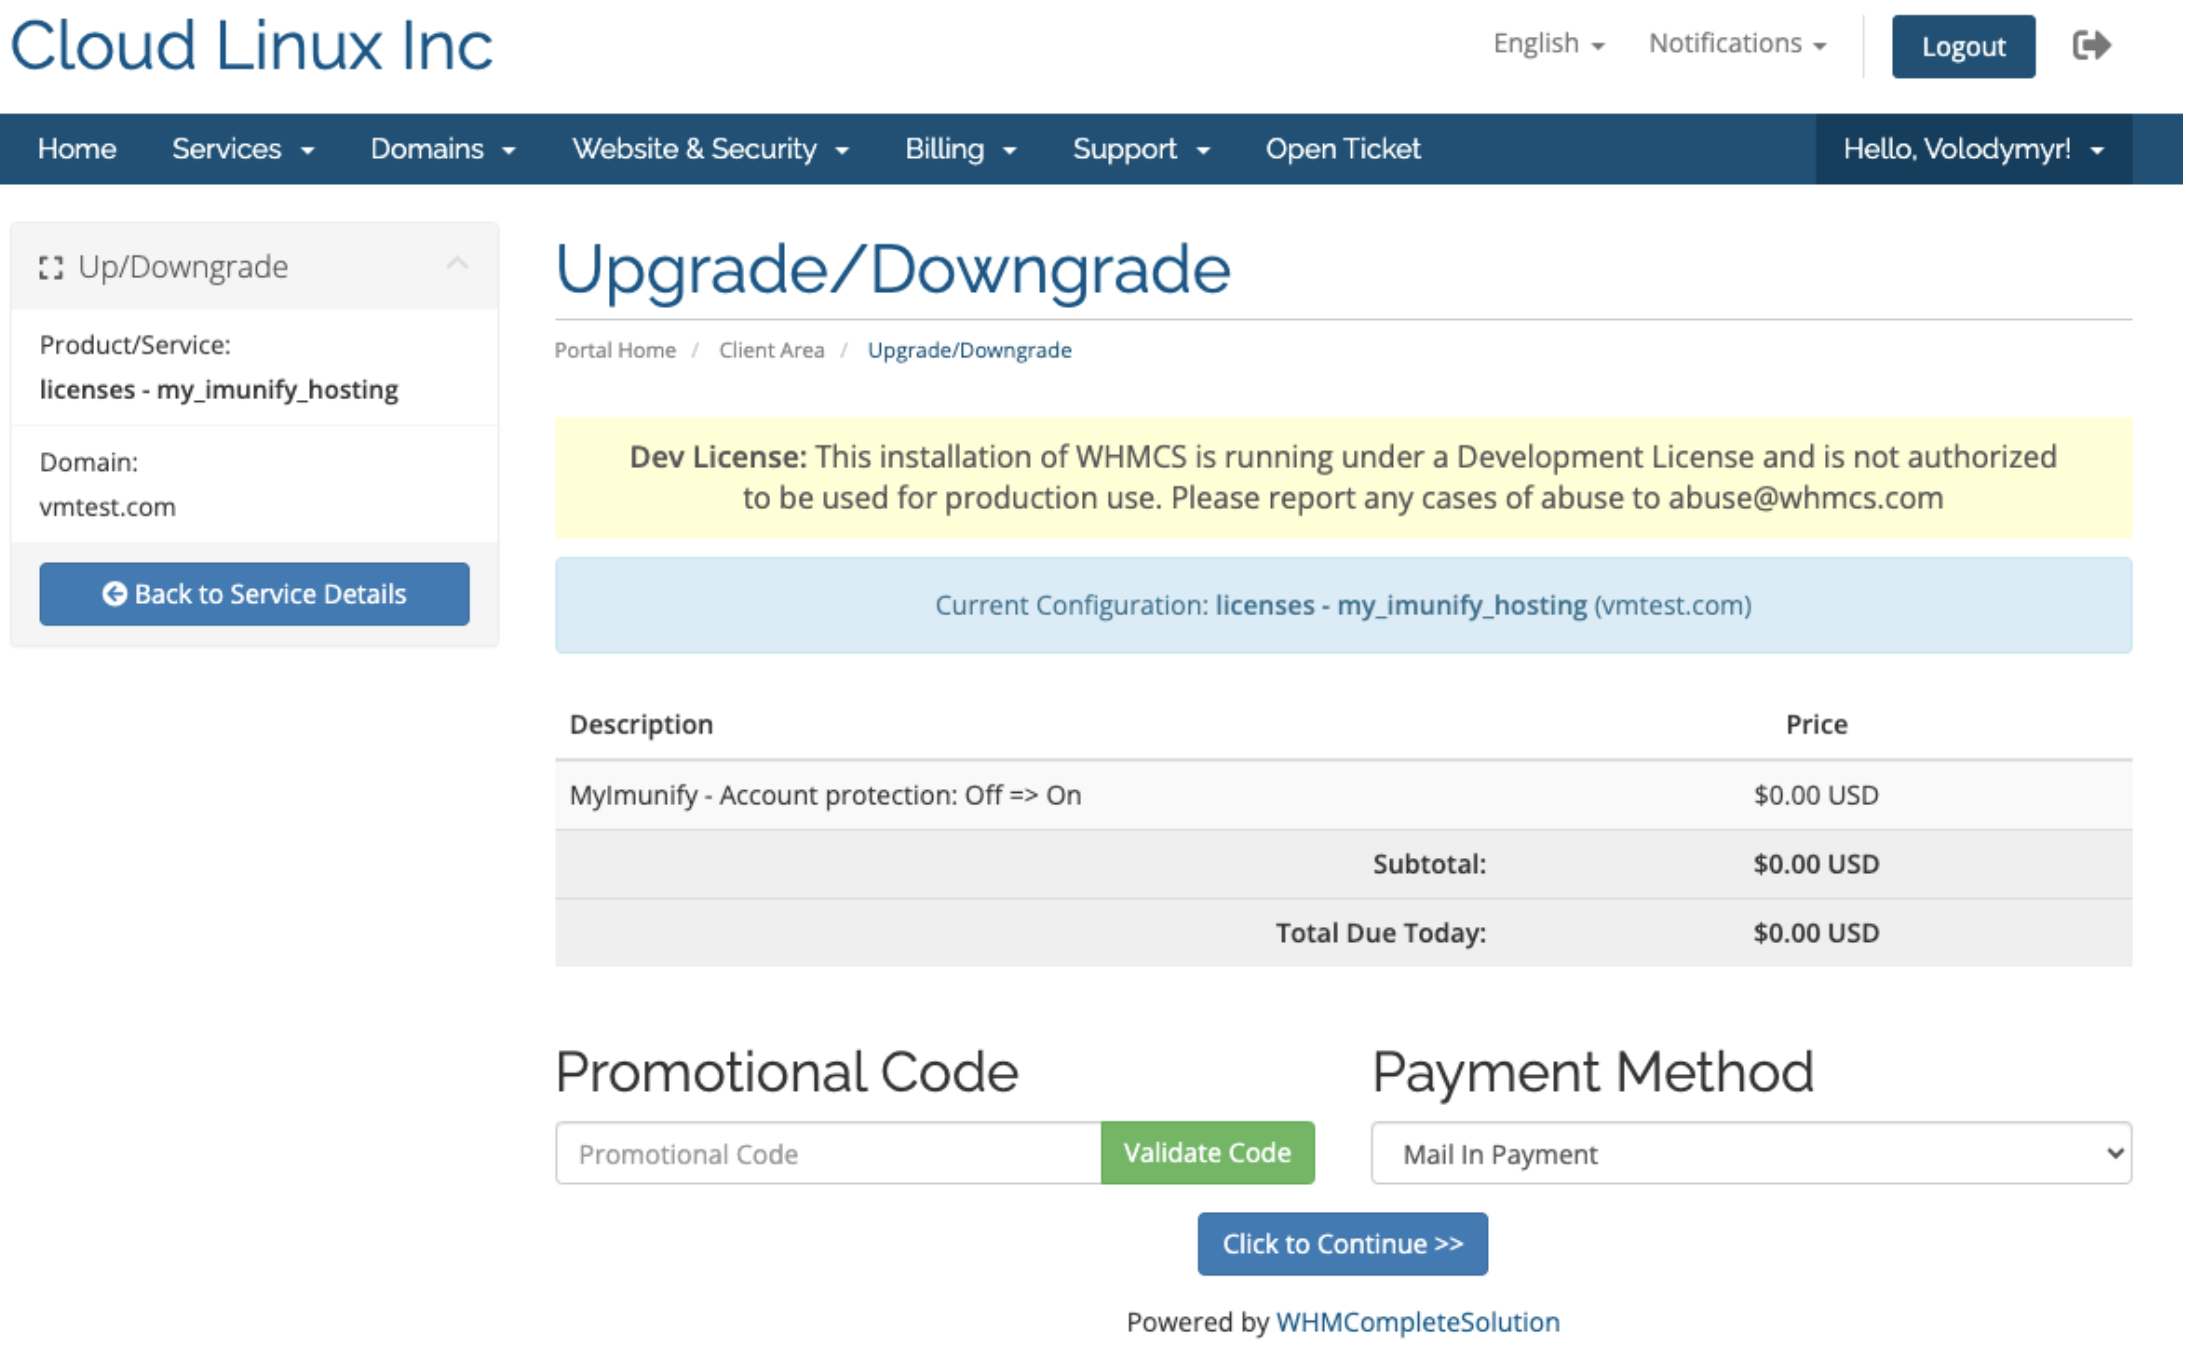
Once a user clicks on the Get Protected button, he/she will be navigated to the WHMCS Client Area "Upgrade/Downgrade" page with the preselected configurable option “MyImunify - Account protection”.
- Click on "New Configuration", select “On” and complete the purchase:
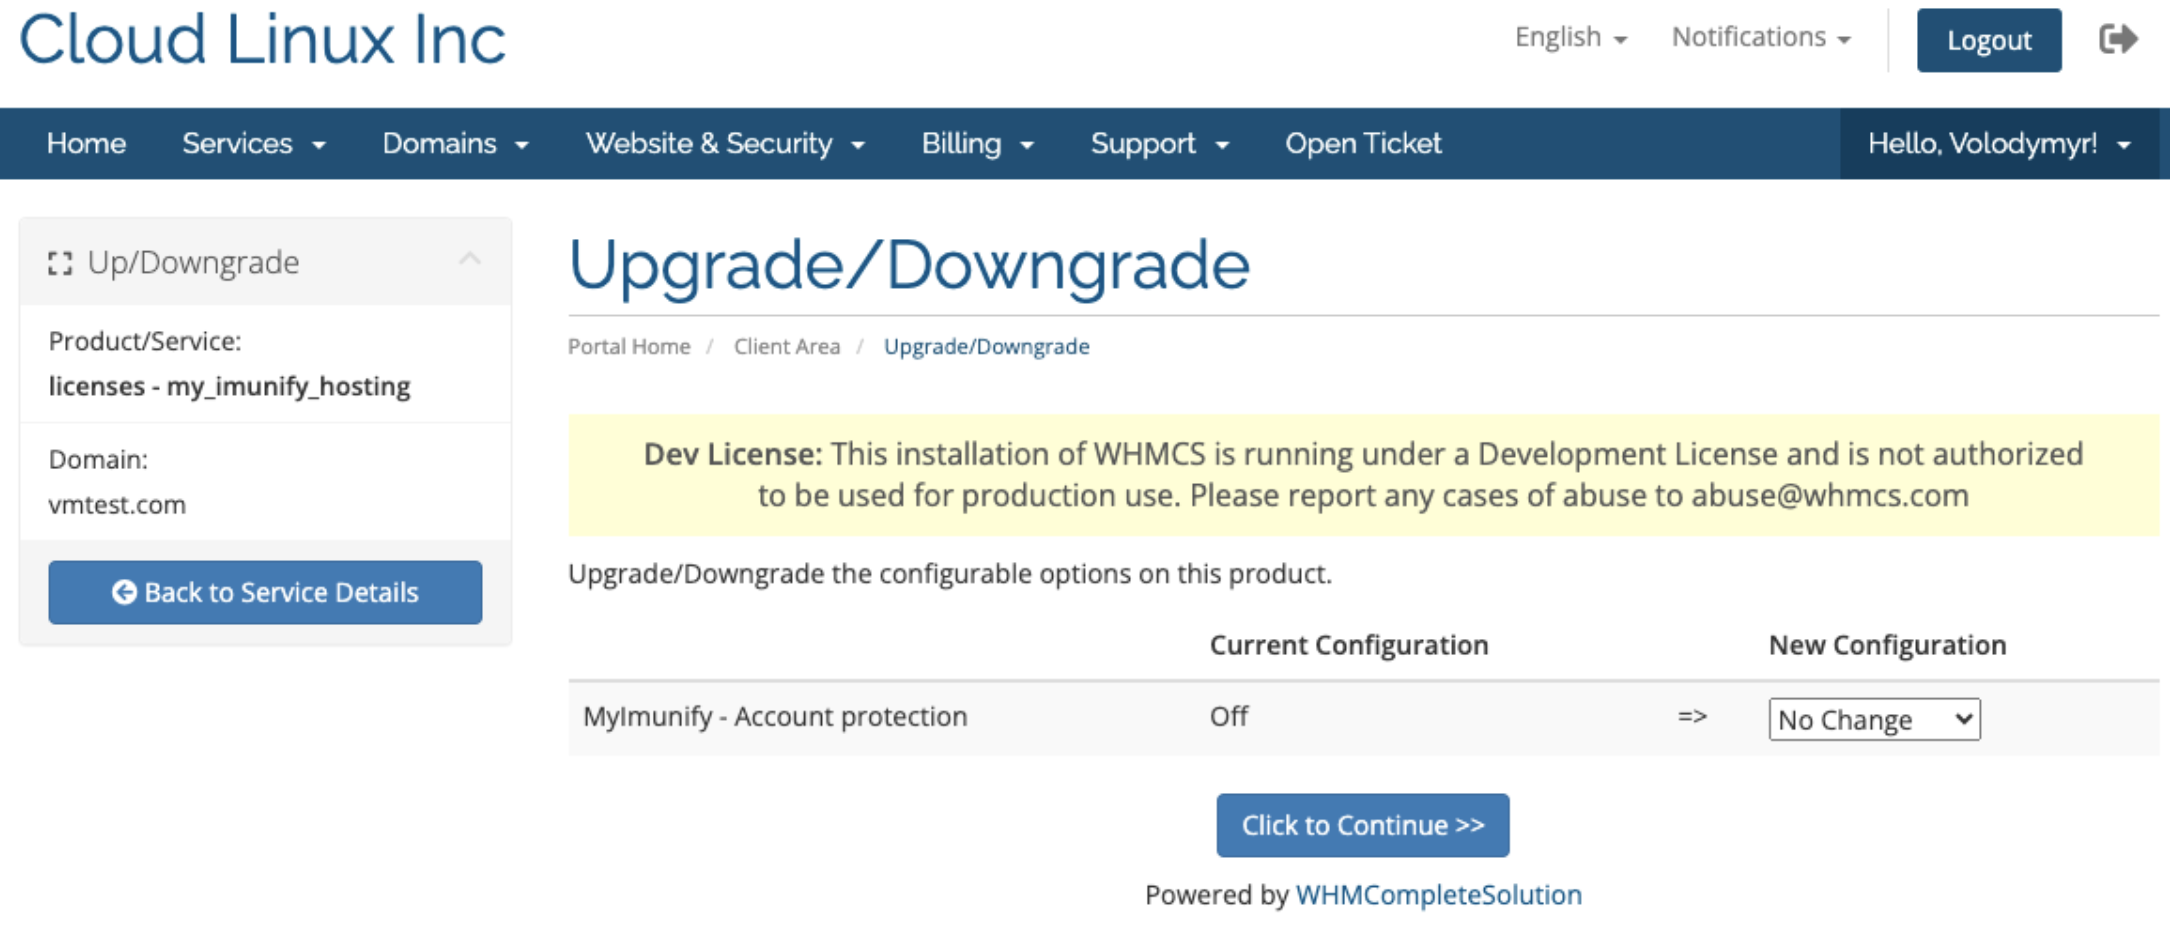
- Here the user needs to select New Conifugation “On”:
Using MyImunify Protection Enabled
Once the purchase is completed, the Imunify360 plugin will be turned into the MyImunify Protection Enabled mode.
MyImunify Protection is completely automated. It takes the burden of scanning and cleaning off a user. However, it might be useful to press “Clean up all” once MyImunify Protection is enabled to expedite malware cleanup.
Users can either see the results of real-time malware scans, clean up malware if needed and use Proactive Defense in “Kill mode”, stopping unknown types of malware. Below is the Proactive Defense in the “Kill mode” demostrated: