Features
External Black/Whitelist Management
To use external files with the list of Black/White IPs, place this list into the following directory:
- for the White List:
/etc/imunify360/whitelist/*.txt
- for the Black List:
/etc/imunify360/blacklist/*.txt
The files may have IP addresses or subnet in CIDR notation.
In order to apply the IP lists, run the following command:
imunify360-agent reload-lists
Or restart the agent.
Warning
Specifying IPs in those files will not prevent Imunify from adding the same IPs to dynamic lists (like Gray list), but all White lists always have the priority over Black lists when it comes to actual filtering of requests/packages.
RapidScan
The RapidScan feature increases scanning speed by lowering system resource usage. Increased scanning speeds and a higher scanning rate further hardens system security posture.
RapidScan techniques
- Faster File Integrity Checking. File metadata - file hashes are stored locally. This means that if the file didn't change since the last scan it won't need to be re-scanned.
- Efficient Cloud-assisted Scanning. Imunify360 stores its malicious file hash database in the cloud. Cloud assistance helps to detect malicious files and skip well known files that were white-listed. This means that only unfamiliar files remain to be scanned locally, resulting in significantly reduced scan times.
- Optimized Malware Signatures. Our malware signature database continually grows to reflect the ever-expanding variety of malicious software. As the database becomes more accurate and comprehensive, it also becomes larger and more cumbersome to index. We tackle this by actively curating the database and re-evaluating complex signatures, recasting any of them that could be improved in order to make a positive effect on scanning performance.
What does it mean for you?
After enabling the RapidScan feature, the next scan runs with the usual speed. However, the subsequent scans speeds will improve, and they will run anywhere between 5 to 20 times faster. This is the case for both on-demand and scheduled scans, and it means, among other things, you can can increase scan frequency without affecting system performance.
To take advantage of this feature, go to your Imunify360 control panel and enable RapidScan in Settings→Malware Scanner. Please see the details here.
Low Resource Usage mode
This is a special operation mode where Imunify360 consumes less CPU and RAM. It is intended for servers with limited resources.
This mode disables WebShield switching off GrayList and Captcha.
Low Resource Usage mode also enables the Minimized Modsec Ruleset option that disables Imunify WAF rules with a high memory footprint, leaving critical rulesets enabled.
When the Low Resource Usage mode is activated it is reflected on the UI: an Imunify main menu changes color to light green, and an appropriate label appears on the top right.

How to switch from the Low Resource Usage mode to the normal resource usage mode
You can switch the mode via CLI and in the UI.
In CLI, run the following commands:
imunify360-agent config update '{"WEBSHIELD": {"enable": true}}'
imunify360-agent config update '{"MOD_SEC": {"ruleset": "FULL"}}'
In the UI, do the following steps:
- Go to Settings | General | WebShield and enable WebShield:
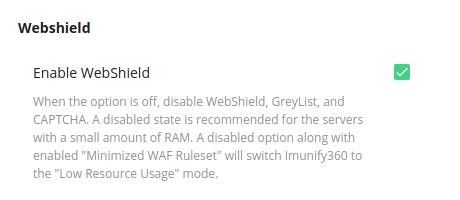
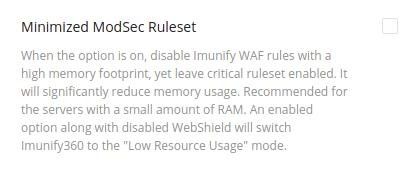
- Go to Settings | General | WAF Settings and disable Minimized ModSec Ruleset:
Exim+Dovecot brute-force attack protection
Note
cPanel only, other panels will be added later
Exim+Dovecot brute-force attack protection is an advanced protection against Dovecot brute-force attacks. PAM module protects against IMAP/POP3 brute-force attack and prevents mail account from being compromised via brute-forcing.
How to enable Dovecot
We recommend using Imunify360 agent config to enable Dovecot because this allows to correctly switch OSSEC rules/configs:
imunify360-agent config update '{"PAM": {"enable": true, "exim_dovecot_protection": true}}'
How to disable Dovecot
To disable all PAM module via config file:
imunify360-agent config update '{"PAM": {"enable": false, "exim_dovecot_protection": false}}'
To disable only Exim+Dovecot via config file:
imunify360-agent config update '{"PAM": {"exim_dovecot_protection": false}}'
The options of the pam_imunufy are placed in the file: /etc/pam_imunify/i360.ini
Values
USER_LOCK_TIMEOUT=5 | a period of time during which a user should be blocked (minutes) |
USER_LOCK_ATTEMPTS=10 | a number of attempts after which a user should be blocked |
USER_LOCK_MINUTES=5 | a period of time (minutes) during which violation attempts from a user are counted; all attempts earlier than USER_LOCK_MINUTES are not counted |
USER_IP_LOCK_TIMEOUT=5 | a period of time during which a user + IP should be blocked (minutes) |
USER_IP_LOCK_ATTEMPTS=10 | a number of attempts after which a user + IP should be blocked |
USER_IP_LOCK_MINUTES=5 | a period of time (minutes) during which violation attempts from a user + IP are counted; all attempts earlier than USER_IP_LOCK_MINUTES are not counted |
IP_LOCK_TIMEOUT=5 | a period of time during which an IP should be blocked (minutes) |
IP_LOCK_ATTEMPTS=10 | a number of attempts after which an IP should be blocked |
IP_LOCK_MINUTES=5 | a period of time during which violation attempts from an IP are counted; all attempts earlier than IP_LOCK_MINUTES are not counted |
rbl=net-brute.rbl.imunify.com. | RBL DNS Zone |
RBL_timeout=5 | this is the wait time for a response from RBL |
RBL_nameserver=ns1-rbl.imunify.com:53 | NS Server |
Notes
Default RBL block time for IP = 4 hours.
How to apply settings
In order to apply new settings in the /etc/pam_imunify/i360.ini, run the following command:
systemctl restart imunify360-pam
How it works
During the last XXX_LOCK_MINUTES we count the number of login failures (unsuccessful login attempts). If the number of attempts exceeds the specified threshold XXX_LOCK_ATTEMPTS, the PAM plugin blocks access for XXX_LOCK_TIMEOUT minutes. After that, the counter is reset and the process repeats. Note that the plugin has three separate counters and a set of settings for USER/IP/USER+IP management regarding brute-force attacks (see the table above).
Notes
- If a user is blocked by
USER_LOCK_ATTEMPTS, then this user will not have access to the server from any IP - If a user is blocked by
USER_IP_LOCK_ATTEMPTS, then this user will not have access to the server from that specific IP - If an IP is blocked by
IP_LOCK_ATTEMPTS, then all users will not have access to the server from that specific blocked IP
Dovecot native brute force protection
Dovecot native brute force protection module improves stability and resolves issues that standard PAM caused in some cases
There were situations when login with enabled PAM would produce log messages like these:
Jun 9 14:45:04 Hostl6 dovecot: auth-worker(31382): Error: pam(user@example.org,<IP>,<SESSION>): Multiple password values not supported
Jun 9 14:45:10 Hostl6 dovecot: pop3-login: Disconnected (auth failed, 1 attempts in 6 secs): user=<user@example.org>, method=PLAIN, rip=<IP>, lip=<IP>, TLS, session=<SESSION>
This happened due to the specificity of PAM’s architecture and the way it processes such cases. We decided to develop a completely new native module for Dovecot with brute force protection functionality. With the new module, Dovecot will not produce any more error messages similar to shown above.
Since the module is fresh, it is in experimental mode – disabled by default for now. This will be changed to “enabled by default” state in later releases.
Now two options can be used to control how brute force protection works for Dovecot:
| Condition | Behavior | |
|---|---|---|
| PAM.exim_dovecot_protection | PAM.exim_dovecot_native | |
| Dovecot protection disabled | ||
Dovecot protection enabled (default)
| ||
Dovecot protection enabled
| ||
The following commands can be used to control the Dovecot native module:
Enable:
# imunify360-agent config update '{"PAM": {"exim_dovecot_native": true}}'
Disable (default):
# imunify360-agent config update '{"PAM": {"exim_dovecot_native": false}}'
Notifications
Starting from version 4.10, an administrator is able to configure email addresses to submit reports and execute custom scripts. Go to Settings and choose Notifications tab.
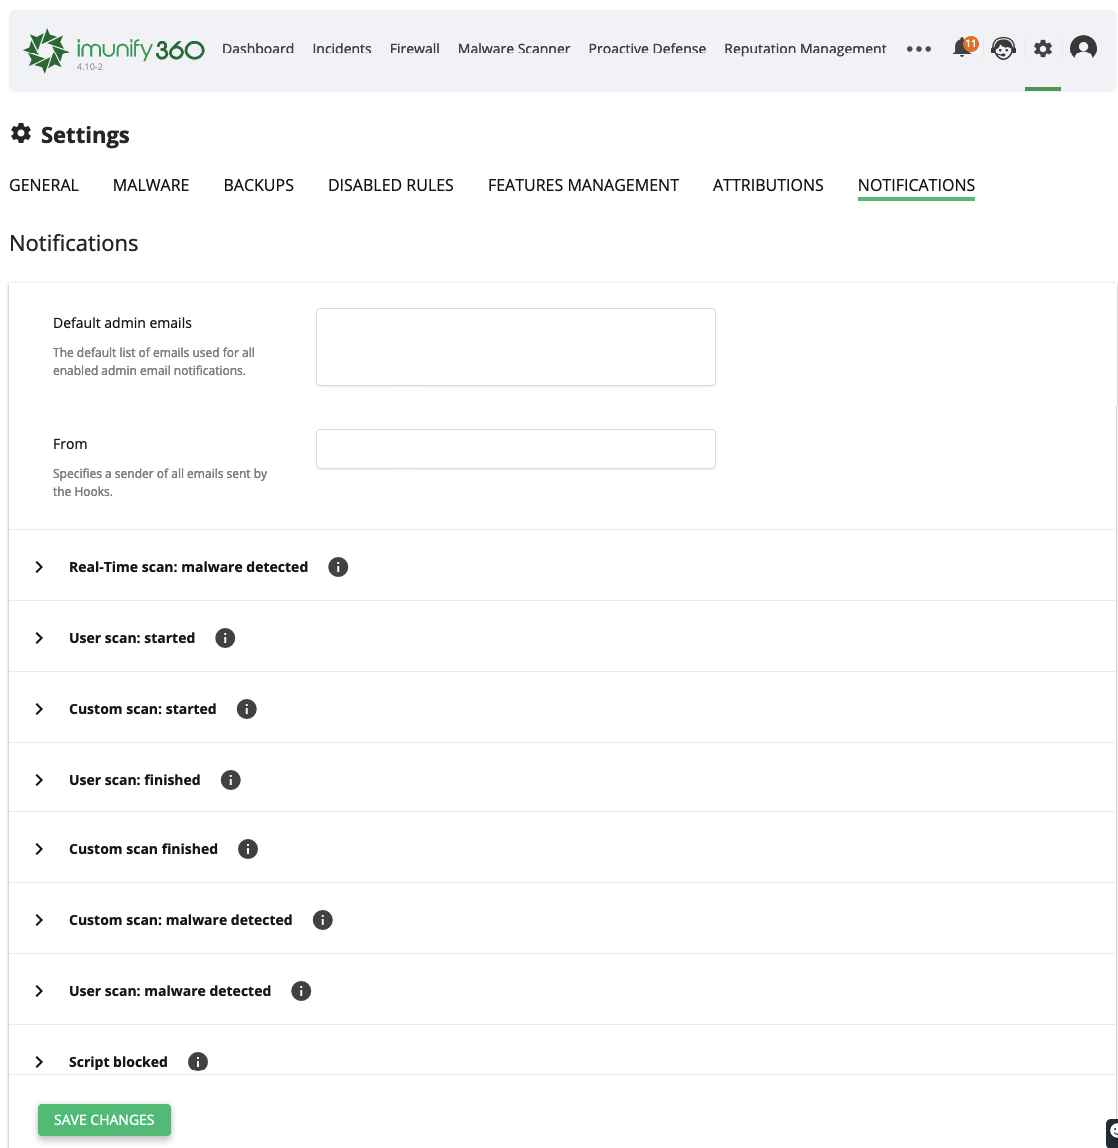
- Default admin emails: specify the default list of emails used for all enabled admin email notifications.
- From: specify a sender of all emails sent by the Hooks.
The following events are available.
Real-Time scan: malware detected
Occurs when malware is detected during the real-time scanning.
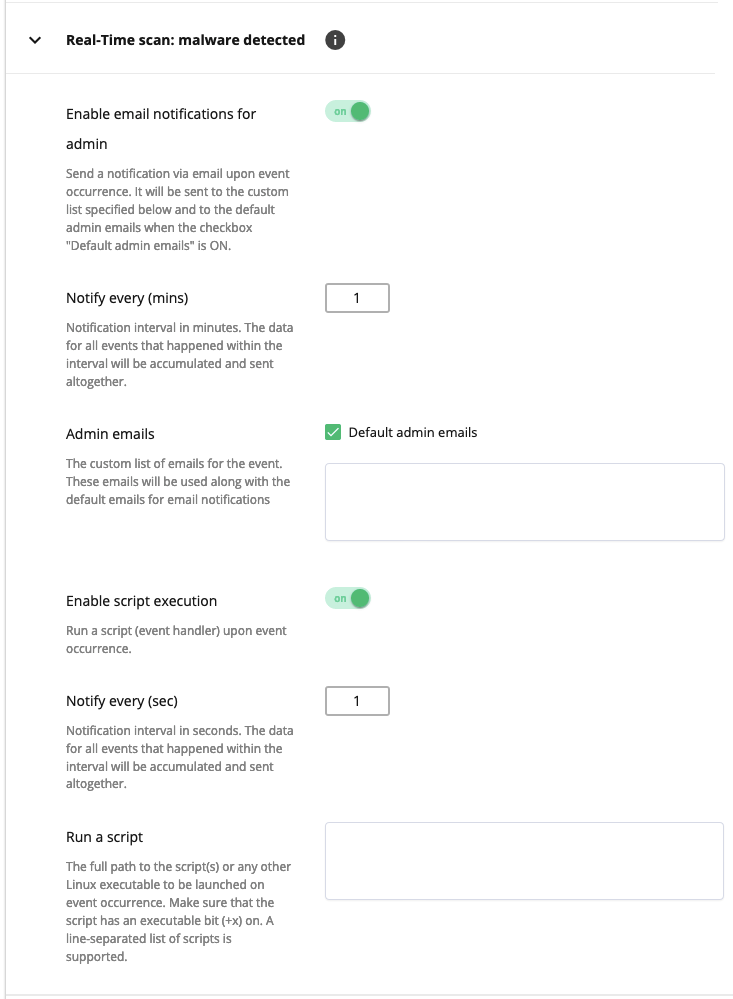
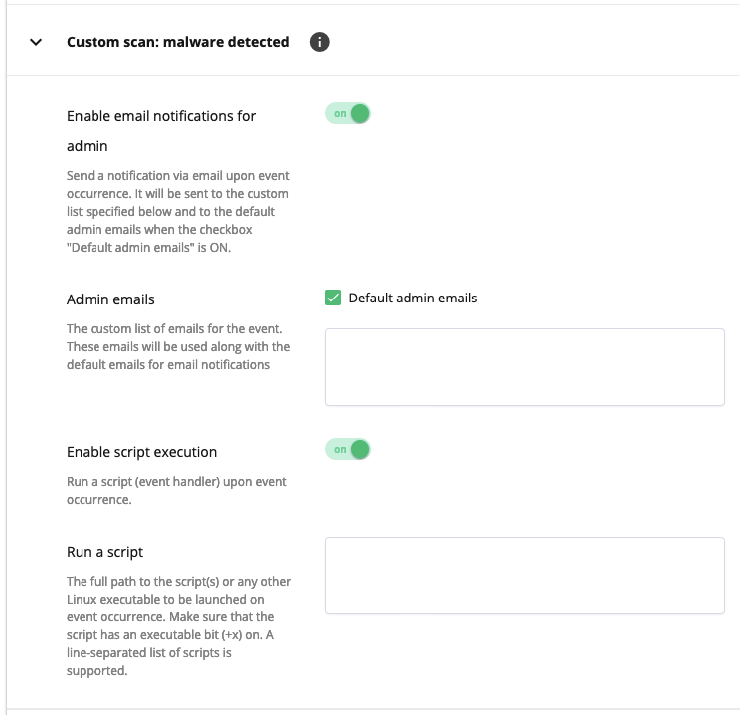
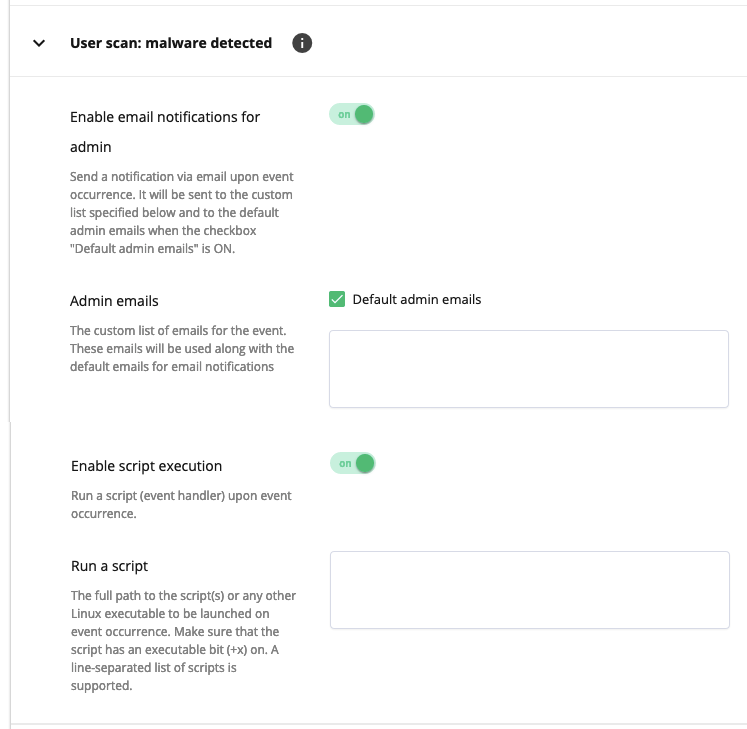
- Enable email notifications for admin: move the slider to ON to notify the administrator and a custom user list via email upon event occurrence. To notify the administrator on the default admin email, tick the Default admin emails checkbox.
- Notify every (mins): set a notification interval in minutes. The data for all events that happened within the interval will be accumulated and sent altogether.
- Admin emails: tick the Default admin emails and/or specify your emails for notifications.
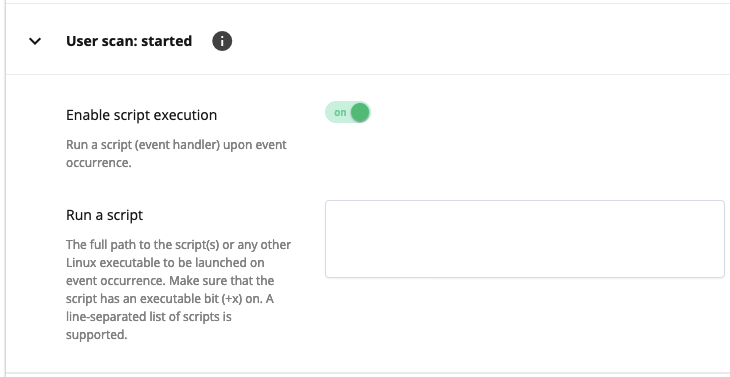
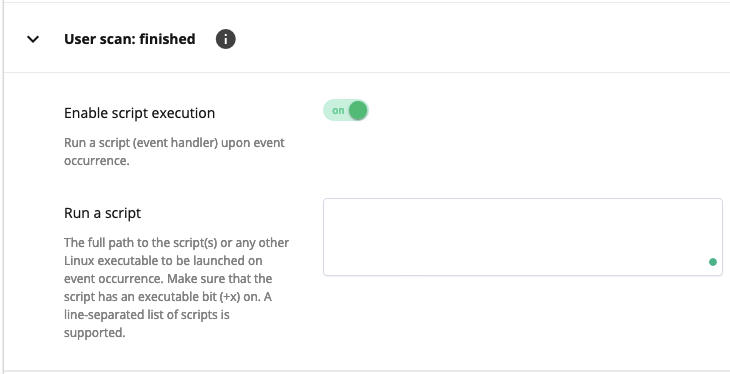
- Enable script execution: move the slide to ON to run a script (event handler) upon event occurrence.
- Notify every (sec): set a notification interval in seconds. The data for all events that happened within the interval will be accumulated and sent altogether.
- Run a script: specify the full path to the script(s) or any other Linux executable to be launched on event occurrence. Make sure that the script has an executable bit (+x) on. A line-separated list of scripts is supported.
User scan: started
Occurs immediately after the user scanning has started.
Custom scan: started

Occurs immediately after on-demand (manual) scanning has started.
User scan: finished
Occurs immediately after the user scanning has finished, regardless the malware has found or not.
Custom scan: finished

Occurs immediately after on-demand (manual) scanning has finished, regardless the malware has found or not.
Custom scan: malware detected
Occurs when the on-demand scanning process has finished and malware found.
User scan: malware detected
Occurs when the malware scanning process of a user account has finished and malware found.
Script blocked
Occurs when the Proactive Defense has blocked malicious script.
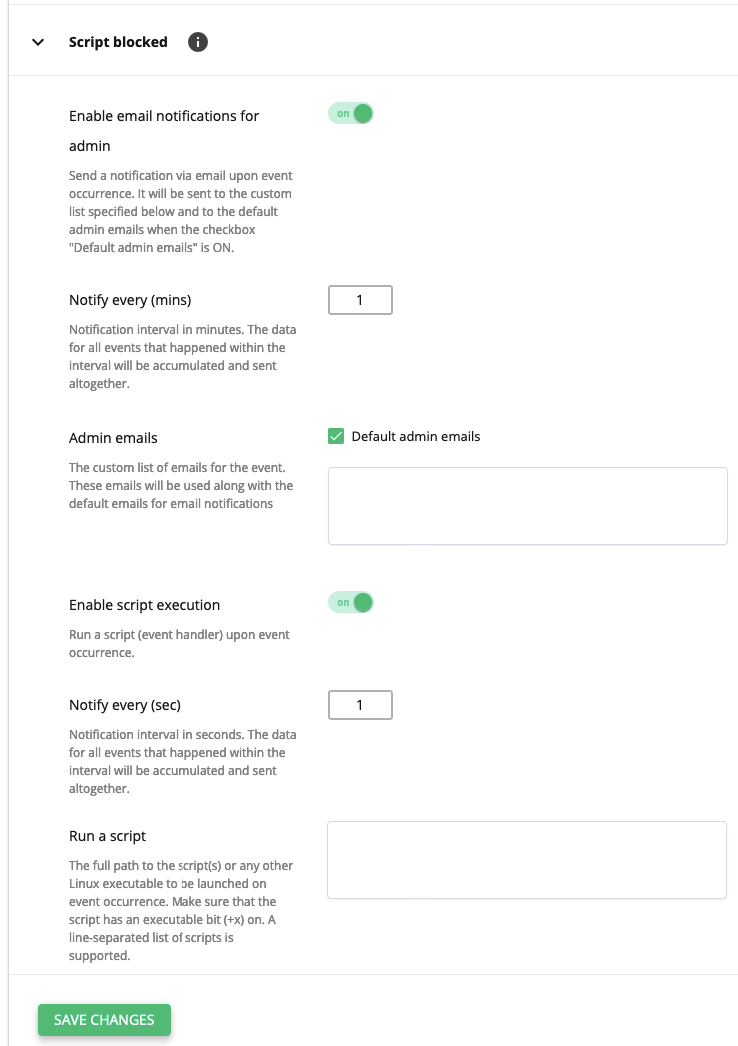
Click Save changes at the bottom to apply all changes.
Malware Database Scanner (MDS)
Malware Database Scanner (MDS) is designed to solve all malware related problems in the database.
Note
Version Imunify360 6.0 or later supports the use of MDS in UI.
Warning
For now, Malware Database Scanner (MDS) supports WordPress and Joomla databases only.
How to use Malware Database Scanner (MDS)
To provide safe work with database MDS supports several methods:
--scan- only scan the database, no changes will be applied--clean- scan database and clean-up malicious--restore- restore data affected by clean-up from the backup CSV file
Note
“Clean” operation includes “scan”, so you don’t need to run a scan before the cleanup. Whereas the “scan” can be used for non-disruptive checks of the database. Cleanup mode creates a backup file that can be used to rollback all changes back. It makes MDS safe to use and prevents websites from breaking and data loss.
The easiest way to use MDS is to run it with --search-configs argument: MDS will try to find the config files and print out database credentials that should be later specified for scanning.
--creds-from-xargs argument can be used to run MDS without a need to manually enter credentials. It allows automating the process of credentials discovery and the scan process.
Usage
/opt/ai-bolit/wrapper /opt/ai-bolit/imunify_dbscan.php [OPTIONS] [PATH]
Options
--host=<host> | Database host |
--port=<port> | Database port |
--login=<username> | Database username |
--password=<password> | Database password |
--password-from-stdin | Get database password from stdin |
--database=<db_name> | Database name |
--prefix=<prefix> | Prefix for table |
--scan | Do scan |
--clean | Do clean |
--search-configs | Find the config files and print out database credentials |
--creds-from-xargs | Discover credentials and do scan |
--report-file=<filepath> | Filepath where to put the report |
--signature-db=<filepath> | Filepath with signatures |
--progress=<filepath> | Filepath with progress |
--shared-mem-progress=<shmem_id> | ID of shared memory segment |
--create-shared-mem | MDS create own shared memory segment |
--status=<filepath> | Filepath with status for control task |
--avdb=<filepath> | Filepath with ai-bolit signatures database |
--procudb=<filepath> | Filepath with procu signatures database |
--state-file=<filepath> | Filepath with info about state (content: new/working/done/canceled). You can change it on canceled. |
--restore=<filepath> | Filepath to restore CSV file |
-h, --help | Display this help and exit |
-v, --version | Show version |
Example of usage
Scan database
# /opt/ai-bolit/wrapper /opt/ai-bolit/imunify_dbscan.php --port=3306 --login=user --password-from-stdin --database=$DATABASE --avdb=/var/imunify360/files/sigs/v1/aibolit/mds-ai-bolit-hoster.db --report-file=`pwd`/report.json --scan
Scan results will be stored in the report.json.
Scan & Clean-up database
# /opt/ai-bolit/wrapper /opt/ai-bolit/imunify_dbscan.php --port=3306 --login=user --password-from-stdin --database=$DATABASE --avdb=/var/imunify360/files/sigs/v1/aibolit/mds-ai-bolit-hoster.db --procudb=/var/imunify360/files/sigs/v1/aibolit/mds-procu2.db --report-file=`pwd`/report.json --clean
Cleanup results will be stored in the results.json. Also, backup of the affected data will be created with a filename similar to the mds_backup_1597223818.csv.
Undo changes (restore)
# /opt/ai-bolit/wrapper /opt/ai-bolit/imunify_dbscan.php --port=3306 --login=user --password-from-stdin --database=$DATABASE --report-file=$REPORT --restore=`pwd`/mds_backup_1597223818.csv
Webshield
Warning
When the interface IP address is added to or deleted from the system, the restart of the webshield is required for the latter to recognize the new IP.
service imunify360-webshield restart
Captcha
The CAPTCHA is a feature intended to distinguish human from machine input and protect websites from the spam and different types of automated abuse. Imunify360 uses reCAPTCHA service.
Warning
Please note that the WebShield Captcha is not compatible with aggressive CDN caching modes, like Cloudflare 'cache everything' with 'Edge Cache TTL'. If the Сaptcha page is cached by CDN, a visitor will see the Captcha from CDN cache disregarding it has been passed or not. In order to fix that, either disable the aggressive CDN caching or the Captcha functionality in the Imunify360.
There are two layers in CAPTCHA behavior:
- If a user of a website is added to the Grey List (the access is blocked), then the CAPTCHA allows him to unblock himself. When he tries to get to the website he is redirected to the Captcha Server by ipset, where he can see the protection page asking to confirm that he is not a robot by ticking a checkbox.
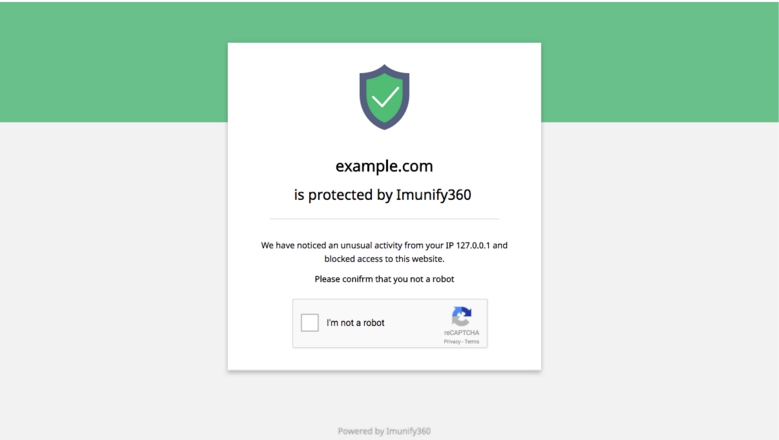
Note
The IP address on the screenshot above is given as an example.
If successful, a user is redirected to the website, which means that the access is unblocked and the IP address of this user is removed from the Grey List.
It is also possible to enable the invisible reCAPTCHA via the Imunify360 Settings page. With the invisible reCAPTCHA enabled, a human user is not required to go through human confirmation - the process will pass under the hood and a user will be redirected to the website. In case if invisible reCAPTCHA failed to detect if a user is a human or not, then visible reCAPTCHA appears.
- The CAPTCHA is always on guard of the websites and checks the activity of each IP. With the help of reCAPTCHA it blocks bots and protects websites from spam and abuse. To learn more about reCAPTCHA follow the link.
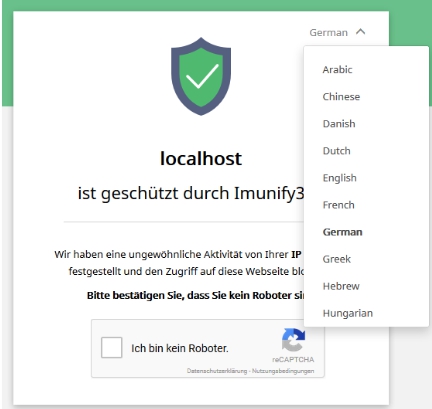
The reCaptcha supports localization. Depending on user’s browser settings, reCaptcha will use the browser default language and allow to change it:
Captcha page customization
To modify footer, header or body of the CAPTCHA use the templates in /usr/share/imunify360-webshield/captcha/templates/.
There are three files:
head.tpl– this file goes inside<head></head>tags. So you can add JavaScript, CSS styles, etc.body.tpl– the main template file, modify it as you wish. CAPTCHA goes above all the layers.static– here you can place images, CSS, JavaScript, etc. and access these files as/static/<filename>.
To find information on supported browsers follow this link https://support.google.com/recaptcha/answer/6223828.
Update Captcha localizations
A user can change the text of captcha messages for the supported languages. Note that adding custom language is not supported.
To change the text of the Imunify360 Captcha and update the localizations text, please do the following:
Locate appropriate Captcha localization files by running:
ls /usr/share/imunify360-webshield/captcha/translations/locale/{lang}/LC_MESSAGES/messages.poFor example for Polish language the catalog looks like this:
/usr/share/imunify360-webshield/captcha/translations/locale/pl/LC_MESSAGES/messages.poUpdate Captcha localization files by editing
msgstr "my customization or translation"for appropriatemsgid “original plain english text".Where
msgstrcontains text that is shown to user andmsgidcontains Captcha original English text.For example:
#: templates/index.html:154
msgid ""
"We have noticed an unusual activity from your <b>IP {client_ip}</b> and "
"blocked access to this website."
msgstr ""
"Zauważyliśmy nietypową aktywność związaną z twoim adresem <b>IP "
"{client_ip}</b> i zablokowaliśmy dostęp do tej strony internetowej"
To add Polish translation edit text in the
msgstrfield. To change the text for a default English translation, edit text in themsgidfield.Save files.
When translation in
messages.pofiles is finished, restart imunify360-webshield service:
service imunify360-webshield restart
- Block yourself (remove your IP from Imunify360 White List and try to log in to the server via ssh with wrong password until it blocks you). Then go to website and log in. Captcha should appear. Set Polish language and assert that new text is displayed.
Changing the default keys to Google reCAPTCHA keys
If a server owner has his own Google reCAPTCHA keys (both private and public), he may use them instead of the default CloudLinux keys.
To set Google reCAPTCHA keys, place your keys into the /etc/imunify360-webshield/webshield-http.conf.d/captchakeys.conf file as shown in the example below:
captcha_site_key <YOUR_SITE_KEY>;
captcha_secret_key <YOUR_SECRET_KEY>;
Then reload WebShield.
Configuring reCAPTCHA keys
See how to setup invisible CAPTCHA.
Why do you need to specify the Google reCAPTCHA keys in the Imunify360 product
Imunify360 admin should specify reCAPTCHA keys for the server since we’re planning to completely remove embedded reCAPTCHA keys in the future versions.
In this article, you can find a step by step guide on how to set up a custom site and secret keys for your Imunify360 server.
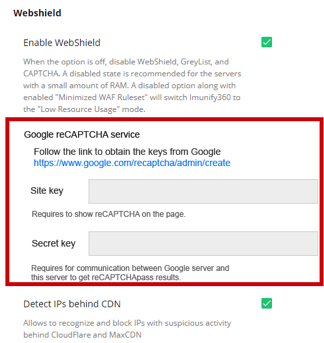
How to specify the keys for the Imunify360 CAPTCHA
Public and secret reCAPTCHA keys are required for integration between Imunify360 and Google reCAPTCHA service.
The site key will be publicly available and shown on pages along with reCAPTCHA widget or Invisible CAPTCHA, whereas the secret key will be stored for intercommunication between the backend of Imunify360 and Google service.
Note: Due to the captcha rate limit we recommend using different reCAPTCHA keys for each server.
Google’s quotation: If you wish to make more than 1k calls per second or 1m calls per month, you must use reCAPTCHA Enterprise or fill out this form and wait for an exception approval.
Steps to configure
Fill in required values
- Set any value as a label, e.g. my servers cluster #1
- Select reCAPTCHA v2
- Select Invisible reCAPTCHA badge
- Add any dummy domain, e.g. example.org
Note
You don’t need to put all your domains here

Accept terms and proceed
Notice keys
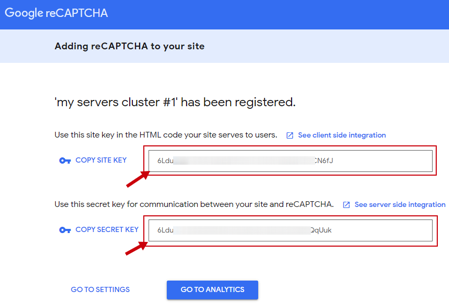
You need to put these keys on the Imunify360 settings page
or use the following CLI commands:
# imunify360-agent config update '{"WEBSHIELD": {"captcha_site_key": "6Ldu4XXXXXXXXXXXXXXXXXXXXXXXXXXXXXXXCN6fJ"}}'

# imunify360-agent config update '{"WEBSHIELD": {"captcha_secret_key": "6Ldu4XXXXXXXXXXXXXXXXXXXXXXXXXXXXXXXQqUuk"}}'
The final step is to allow Google to process requests from any of your domains
Open the Settings page
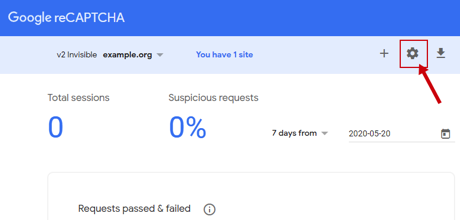
And disable the Verify the origin of reCAPTCHA solutions
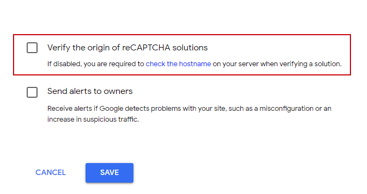
That’s it.
Verification
In order to make sure that you’ve done everything correctly you need to do the following:
Make sure that your IP is not whitelisted (using the CLI):
# imunify360-agent whitelist ip list
IP          TTL    COUNTRY  IMPORTED_FROM  COMMENT
1.2.3.4     10256  None     None           Whitelisted for 3 hours due to successful panel login

# imunify360-agent whitelist ip delete 1.2.3.4
OK

# imunify360-agent whitelist ip list
IP          TTL    COUNTRY  IMPORTED_FROM  COMMENT
Make sure your target domain is not whitelisted:
# imunify360-agent whitelist domain list
example.com
# imunify360-agent whitelist domain delete example.com OKSend at least two WAF test requests to any domain on the server
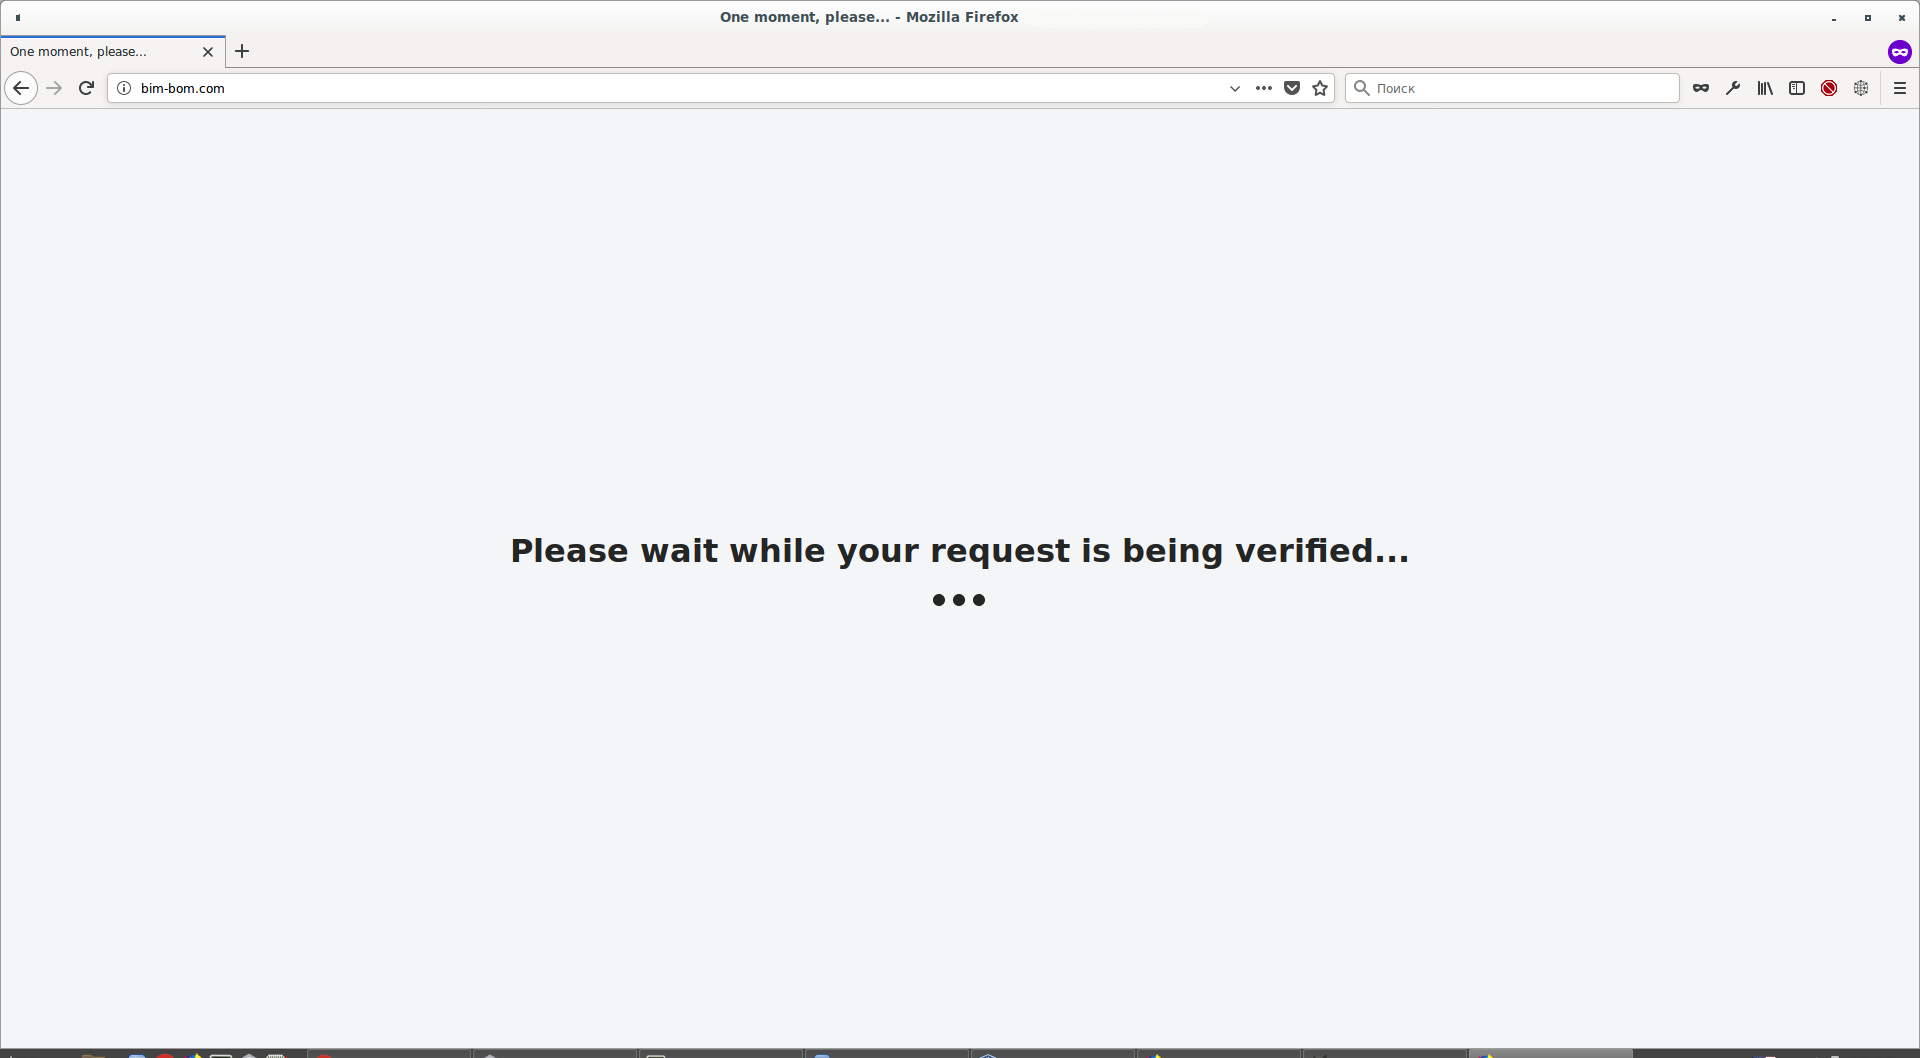
# curl -v http://example.org/?i360test=88ff0adf94a190b9d1311c8b50fe2891c85af732Open your test domain in the browser and let it pass the captcha challenge
Check the list of whitelisted IPs again
# imunify360-agent whitelist ip list
IP          TTL    COUNTRY  IMPORTED_FROM  COMMENT
1.2.3.4     86377  None     None           IP auto-whitelisted with expiration date: 2020-05-28 15:29:34
If you see that your IP is whitelisted then integration between Imunify360 and reCAPTCHA service was done properly.
You can watch how invisible reCAPTCHA works at https://www.youtube.com/watch?v=GQXmAj5hyDo.
Note
It is also possible to test Captcha by the server IP. Find more information here
CDN Support
Imunify360 correctly graylists and blocks IPs behind Cloudflare and other CDNs (see here for the full list).
Imunify360 passes all requests from CDN through WebShield, and uses CF-Connecting-IP and X-Forwarded-For headers to identify real IPs.
To enable it now, run the command:
imunify360-agent config update '{"WEBSHIELD": {"known_proxies_support": true}}'
Note
If you are using cPanel/EasyApache3, Imunify360 will not automatically deploy mod_remoteip, and log files will show local server IP for visitors coming from CDN. EasyApache 3 is EOL since December 2018, and we don't plan to add automated mod_remoteip setup and configuration for it.
Note
For cPanel/EasyApache 4, Plesk, DirectAdmin and LiteSpeed mod_remoteip will be automatically installed and configured.
Supported CDN providers:
- Cloudflare
- MaxCDN
- StackPath CDN
- KeyCDN
- Dartspeed.com
- QUIC.cloud CDN
- NuCDN
- Google CDN
- CloudFront CDN
- GoCache CDN
- Opera
- QUANTIL
- QUIC.cloud CDN
- BunnyCDN
- Sucuri WAF
- Ezoic
How to trust all IPs that are specified by Ezoic CDN
The “trust_ezoic” option for WebShield allows you to trust all IPs that are specified by Ezoic CDN as their own servers. By default the option is switched off, but it can be switched on in a straightforward way. Be aware when using this option, at this moment the list of Ezoic CDN servers is quite big and includes ranges that can be controlled by someone else in Amazon EC2.
To enable it, open the /etc/imunify360-webshield/virtserver.conf file, find the directive set
$trust_ezoic 0;
replace 0 with 1, save the file and restart WebShield, using the following command:
# service imunify360-webshield restart
SplashScreen for Chinese customers
Imunify360 Captcha isn't available in some countries due to certain restrictions, for example, in China. To alleviate this, Chinese customers can use Imunify360 SplashScreen as Captcha.
To enable SplashScreen, open the file /etc/imunify360-webshield/wscheck.conf, find the following line:
wscheck_splashscreen_as_captcha off;
Change off to on:
wscheck_splashscreen_as_captcha on;
Save the file and run the following command:
For Ubuntu:
service imunify360-websheld reload
For CentOS:
systemctl reload imunify360-webshield
The graylisted visitors will see such screen for 5 seconds before redirecting to their initial destination.
Note
You can find WebShield and Captcha related logs in the /var/log/imunify360-webshield/ file.
How to block attacks from a particular country in WebShield
Country blocking is available in both Admin UI and CLI
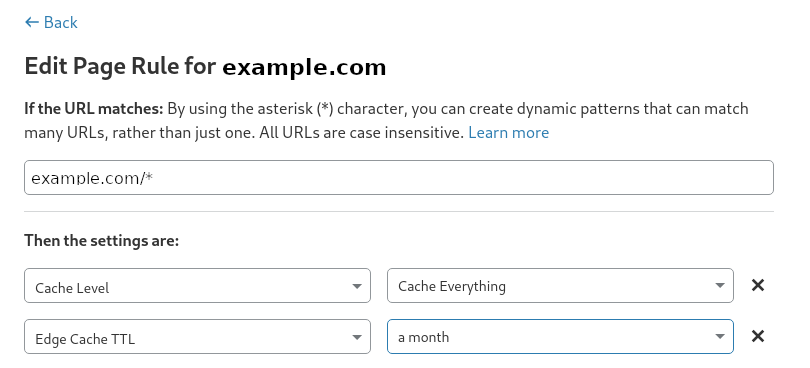
Using Cloudflare “Cache Everything” with Imunify360
According to the Cloudflare documentation, Cache Everything with Edge Cache TTL enabled makes Cloudflare ignore all origin cache-related headers (see attached screenshots) which in the past, caused issues by custom cache settings in the Cloudflare control panel resulting in the inability to pass the Captcha causing an endless loop:
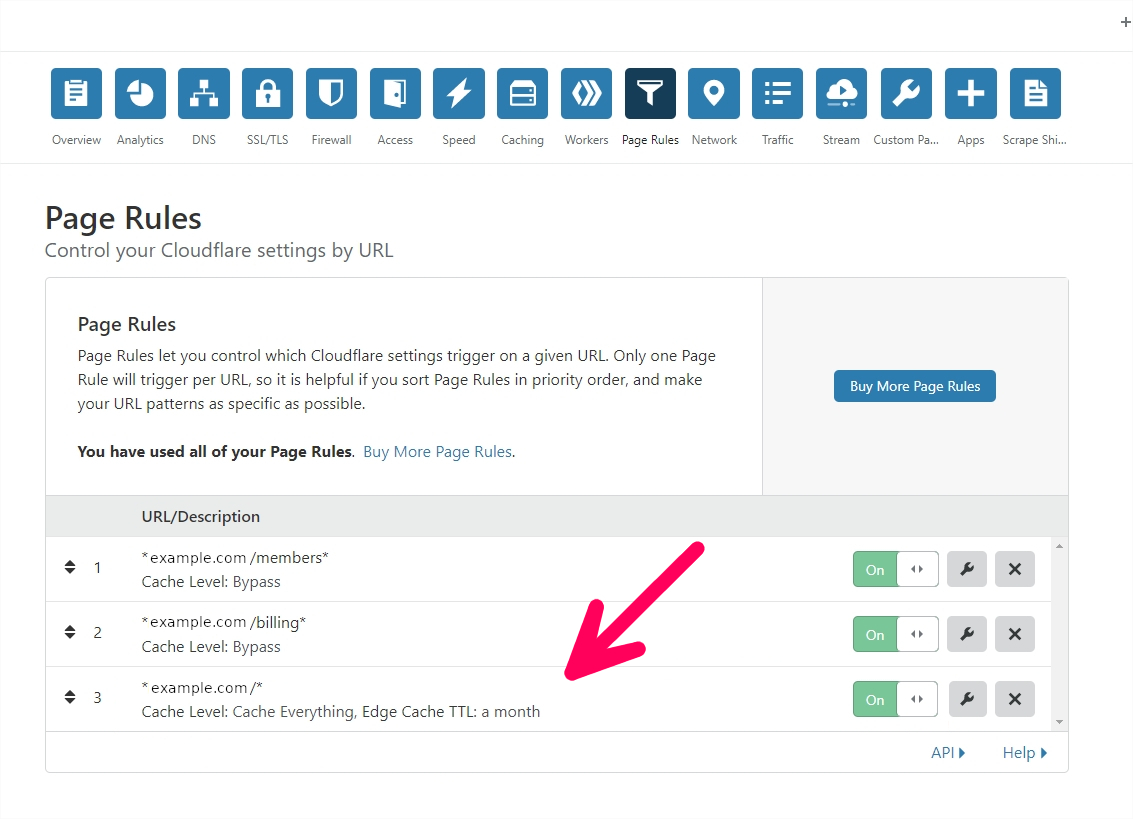
Quote:
Level “Cache Everything” – Treats all content as static and caches all file types beyond the Cloudflare default cached content. Respects cache headers from the origin web server unless Edge Cache TTL is also set in the Page Rule. When combined with an Edge Cache TTL > 0, Cache Everything removes cookies from the origin web server response.
Setting Edge Cache TTL along with the Cache Everything option is not recommended though it should not create any issues now because Captcha is already disabled for Cloudflare IPs by default. It is possible to enable Captcha as long as you either:
- don’t use “Edge Cache TTL” + “Cache Everything” in Cloudflare
- or use “Edge Cache TTL” but add a page rule that would prevent Cloudflare from caching pages with a cookie
cl-bypass-cache: yes(“Bypass Cache on Cookie”)
- Edit the file
/etc/imunify360-webshield/wscheck.conf - Set
cloudflare_captcha on; - Run
systemctl reload imunify360-webshield
Anti-bot protection
Starting from version 5.6, Imunify360 distinguishes bots from real visitors using the JavaScript challenge "Splash Screen." Most bots don’t solve the challenge, and their requests will not reach web applications such as WordPress, Drupal, and others. This can save the server’s resources and protects websites from scanners, automated attacks, and web-spammers.
Only bad actors will be redirected to the Imunify360 Splash Screen challenge page. Legitimate visitors get original content without any verification page nor any delay. The users forced to the Splash Screen will not see the challenge or CAPTCHA and be redirected to the page with the original content. Cookies and JavaScript support are required in a browser to successfully pass the challenge of Anti-bot protection.
The “Anti-bot protection” feature will not block legitimate bots (e.g., Google crawler).
You can enable Anti-bot protection, in the UI. Go to the General tab -> Settings and check the Anti-bot protection checkbox. You can find the details here.
Or via CLI. To do so, run the following command:
# imunify360-agent config update '{"WEBSHIELD": {"splash_screen": true}}'
cPanel account protection
Starting from v7.1, Imunify360 includes the extended the well-established Anti-bot protection functionality to cPanel to ensure that users are protected from bot attacks. All users trying to log in to cPanel will face up with the “Splash Screen” JavaScript challenge.
Most bots are unable to solve the challenge, and their requests will not reach the cPanel login page. All users using regular browsers may pass the challenge automatically. After passing the Splash Screen, a user receives a cookie for 24 hours and does not need to pass it again for the whole session.
As bots and other automation are not supposed to pass the challenge, all legitimate automation should be whitelisted by IPs.
The feature is switched off by default. To switch the feature on, use the following CLI command:
# imunify360-agent config update '{"WEBSHIELD":{"panel_protection":true}}'
To switch it off:
# imunify360-agent config update '{"WEBSHIELD":{"panel_protection":false}}'
Note
- The Webshield module with the Splash Screen functionality should also be switched on for enabling the feature.
- You can find WebShield and Captcha-related logs in the /var/log/imunify360-webshield directory.
- The feature works with the standard cPanel ports (2082, 2083). Contact Support if you have a non-standard cPanel ports configuration or need the feature for other ports.
Overridable config
Starting from Imunify360 v.5.8, we introduce the overridable config which provides the ability to provision default config for the whole fleet of Imunify servers and keep the ability for fine-tuning each particular server depending on its requirements.
Configs organization:
- A new directory for custom configs. The local overrides of Imunify360 config are put there:
/etc/sysconfig/imunify360/imunify360.config.d/ - The old config
/etc/sysconfig/imunify360/imunify360.configis now linked to theimunify360.config.d/90-local.config. It contains changes made through UI as well as through CLI. - Default Imunify360 configuration is written at
imunify360.config.defaults.example. Modifying this config won't affect config merging behavior in any way, so please refrain from changing it. - Configs in that directory will override the
imunify360.config.defaults.exampleand each other in lexical order. First-level "sections" (such asFIREWALL) are merged, while second-level "options" (such asFIREWALL.TCP_IN_IPv4) are replaced completely. imunify360.config.d/10_on_first_install.configis a config that is supplied by Imunify360. Its purpose is to let us - Imunify360 developers - enable new features only on new installations without forcing existing installation to see new feature enabled on the update. This config should not be modified manually.
Note
The config file named starting from 90 and later will override values set via UI or CLI.
Warning
Ensure you are using the correct order for your config files to be allocated:
100-host_custom.config # custom config that would not override the main one due to the lexicographic naming
101-xmlrpc.config # custom config that contains settings that also will not override the config 90-local* and so on
90-local.config -> ../imunify360.config # contains settings configured via the UI/CLI
95-host-TCPPORTS.config # will override 90-local*
96-host-UDPPORTS.config # will override the above loaded
Below is an example of the INCORRECT assumption of the config loading order:
90-local.config -> ../imunify360.config
95-host-TCPPORTS.config
96-host-UDPPORTS.config
100-host_custom.config
101-xmlrpc.config
This way you can keep your local customizations, and still be able to rollout your main config.
The following CLI command can be used to check current server configuration:
imunify360-agent config show
Current server configuration is also present at /etc/sysconfig/imunify360/imunify360-merged.config path.
The following CLI command:
imunify360-agent config show defaults
can be used to check server configuration in the following states:
mutable_configrepresents config state before applyingimunify360.config.d/90-local.config,local_configrepresents parsedimunify360.config.d/90-local.configconfig,immutable_configrepresents merged configs which come afterimunify360.config.d/90-local.configin lexical order.
Here is an example of custom server configuration:
imunify360.config.defaults.exampleProvided by Imunify installation. Contains default recommended configuration | FIREWALL:TCP_IN_IPv4:- '20'- '8880'port_blocking_mode: ALLOW |
imunify360.config.d/50-common.configProvisioned by server owner to the fleet of servers. | FIREWALL:TCP_IN_IPv4:- '20'- '21'port_blocking_mode: DENY |
imunify360.config.d/90-local.configContains local customization per server individually. | FIREWALL:TCP_IN_IPv4:- '20'- '22'- '12345' |
The resulting (merged) configuration will look like this:
FIREWALL:
  TCP_IN_IPv4:
  - '20'
  - '22'
  - '12345'
  port_blocking_mode: DENY
The mechanics is as follows: first-level "sections" - for example FIREWALL are merged, while second-level "options" - for example FIREWALL.TCP_IN_IPv4 are replaced completely.
Those who don’t need this type of overridable configs can continue using custom configurations in the /etc/sysconfig/imunify360/imunify360.config.
This feature is backward compatible.
Scan of the system and user crontab files for malicious jobs
On the web server, the user’s Crontab files are notoriously tricky to maintain secure because of specific format and various placement of the files outside of users’ home directories depending on specific OS and platform, which makes them a compelling target for malicious actors.
This feature detects any Crontab infection among the files that are owned by users of the server for every role that has access to run the scans on that server.
The feature is available as experimental starting from Imunify360 version 6.10 and switched off by default.
The setting MALWARE_SCANNING.crontabs allows you to enable or disable scan of the system and user crontab files for malicious jobs.
Manage it through CLI:
To switch it on:
# imunify360-agent config update '{"MALWARE_SCANNING": {"crontabs": true}}'
And to switch it off:
# imunify360-agent config update '{"MALWARE_SCANNING": {"crontabs": false}}'
Hooks
You can use a new notification system via CLI and UI.
Overview
Hooks are introduced as a script-based interface for various application events. This is a simple and effective way to automate Imunify360 alerts and event processing. For example, an administrator can have Imunify360 calling his own script when malicious files are detected or misconfigurations are detected and perform a custom processing or specific actions, for example, create a ticket. Hooks are available only via CLI.
Requirements
- You can use any programming language to create a hook script
- A hook script should be executable
- For Native hooks, you should use Python 3.5 only
How to start using hooks
Start using hooks with three simple steps:
Create a script to handle an event (a hook handler):
- you can use our scripts example as a template
- the following events are available
Register your hook handler in Imunify360 agent - use registration command:
imunify360-agent hook add --event <event name> --path </path/to/hook_script>
- Once the event added - check results and the log file
Available events and their parameters
agent
- subtype ( started | misconfig )
started - the event is generated each time the Imunify agent is started/restarted
- params[]
- version / string / version of agent
{"version": "4.6.2-2"}- params[]
misconfig - the event is generated when the agent detects agent misconfiguration / broken settings / etc.
- params[]
- error / string / error message where / what type of misconfiguration was detected and some details
{ "error": "ValidationError({'SMTP_BLOCKING': [{'allow_groups': ['must be of list type']}]},)" }- params[]
malware-scanning
subtype ( started | finished )
started - the event is generated when the malware scanning process is started (for on-demand and background scans only, yet not the ftp / waf / inotify)
- params[]
- scan_id / string / identifier of running scan
- path / string / path that’s scanning
- started / int / unixtime when scan started
- scan_type / string / type of scanning (“on-demand”, “background”, “ftp”, “rescan“)
- scan_params[] / initial scanning params
- file_patterns / string / file mask to scan
- exclude_patterns / string / file mask to ignore
- follow_symlinks / boolean / shall scanner follow symlinks
- intensity_cpu / int / intensity for cpu operations (from 1 to 7)
- intensity_io / int / intensity for IO operations (from 1 to 7)
- intensity_ram / int / amount of memory allocated to the scan process in MB
{ "scan_id": "dc3c6061c572410a83be19d153809df1", "home": "/home/a/abdhf/", "user": "abdhf", "type": "background", "scan_params": { "file_patterns": "*", "exclude_patterns": null, "follow_symlinks": true, "intensity_cpu": 2 "intensity_io": 2 "intensity_ram": 2048 } }- params[]
finished - the event is generated when the malware scanning process is finished (for on-demand and background scans only, yet not the ftp / waf / inotify)
- params[]
- scan_id / string / identifier of running scan
- path / string / path that’s scanned
- started / int / unixtime when scan started
- scan_type / string / type of scanning (“on-demand”, “background”, “ftp”, “rescan“)
- total_files / int / total number of files that were scanned
- total_malicious / int / number of detected malicious files
- error / string / error message if any occurred during scanning
- status / string / status of scan (“ok”, “failed”)
- users[] / string array/ user that’s scanned
- scan_params[] / initial scanning params
- file_patterns / string / file mask to scan
- exclude_patterns / string / file mask to ignore
- follow_symlinks / boolean / shall scanner follow symlinks
- intensity_cpu / int / intensity for cpu operations (from 1 to 7)
- intensity_io / int / intensity for IO operations (from 1 to 7)
- intensity_ram / int / amount of memory allocated to the scan process in MB
{ "scan_id": "dc3c6061c572410a83be19d153809df1", "path": "/home/a/abdhf/", "started": 1587365282, "scan_type": "background", "total_files": 873535, "total_malicious": 345, "error": null, "status": "ok", "users": ["abdhf"], "scan_params": { "file_patterns": "*", "exclude_patterns": null, "follow_symlinks": true, "intensity_cpu": 2 "intensity_io": 2 "intensity_ram": 2048 } }- params[]
malware-detected
- subtype ( critical )
critical
- params[]
- scan_id / string / unique id of the scan
- scan_type / string / type of scanning (“on-demand”, “background”, “ftp”, “rescan“)
- error / string / error message if any occurred during scanning
- started / int / unixtime when the scan was started
- path / string / path that was scanned
- users[] / string array / users that have been scanned (if any)
- total_files / int / number of files checked within the last scanning
- total_malicious / int / number of detected malicious files
- tmp_filename / string / path to a temporary file with a list of detected threads. The list of threads is in the format of the following command:
imunify360-agent malware malicious list --by-scan-id=... --json
{
    "scan_id": "dc3c6061c572410a83be19d153809df1",
    "scan_type": "on-demand",
    "path": "/home/a/abdhf/",
    "users": [
        "imunify",
        "u1"
    ],
    "started": 1587365282,
    "total_files": 873535,
    "total_malicious": 345,
    "error": null,
    "tmp_filename": "/var/imunify360/tmp/malware_detected_critical_sldkf2j.json"
}
[ { "scan_id": "dc3c6061c572410a83be19d153809df1", "username": "imunify", "hash": "17c1dd3659578126a32701bb5eaccecc2a6d8307d8e392f5381b7273bfb8a89d", "size": "182", "cleaned_at": 1553762878.6882641, "extra_data": { }, "malicious": true, "id": 32, "status": "cleanup_removed", "file": "/home/imunify/public_html/01102018_2.php", "type": "SMW-INJ-04174-bkdr", "scan_type": "on-demand", "created": 1553002672 }, { "scan_id": "dc3c6061c572410a83be19d153809df1", "username": "imunify", "hash": "04425f71ae6c3cd04f8a7f156aee57096dd658ce6321c92619a07e122d33bd32", "size": "12523", "cleaned_at": 1553762878.6882641, "extra_data": { }, "malicious": true, "id": 33, "status": "cleanup_done", "file": "/home/imunify/public_html/22.js", "type": "SMW-INJ-04346-js.inj", "scan_type": "on-demand", "created": 1553002672 }, ... ]- params[]
Note
All results can be saved in a temporary file before handler invocation and then remove the file after the event is being processed
malware-cleanup
subtype ( started | finished )
started - the event is generated when the malware cleanup process is started (for on-demand and background cleanup only, background auto-cleanup will be implemented later)
- params[]
- cleanup_id / string / unique id of the cleanup
- started / int / unixtime when the cleanup was started
- tmp_filename / string / path to a temporary file with a scanning report. The list is in the format of the following command:
imunify360-agent malware malicious list --by-scan-id=... --json. See malware-detected hook section for details. - total_files / int / number of files that were sent for cleanup
{ "cleanup_id": "dc3c6061c572410a83be19d153809df1", "started": 1587365282, "total_files": 873535, "tmp_filename": "/var/imunify/tmp/hooks/tmp_02q648234692834698456728439587245.json", }- params[]
finished - the event is generated when the malware scanning process is finished (for on-demand and background cleanup only, background auto-cleanup will be implemented later)
- params[]
- cleanup_id / string / identifier of running cleanup
- started / int / unixtime when cleanup started
- total_files / int / number of files that were sent for cleanup
- total_cleaned / int / number of files that were successfully cleaned
- tmp_filename / string / path to a temporary file with a list of results.
- error / string / error message if any occurred during cleanup
- status / string / status of scan (“ok”, “failed”)
{ "cleanup_id": "dc3c6061c572410a83be19d153809df1", "started": 1587365282, "total_files": 873535, "total_cleaned": 872835, "tmp_filename": "/var/imunify/tmp/malware_cleanup_finished_slkj2f.json", "error": null, "status": "ok" }- params[]
license
subtype ( expiring | expired | renewed )
- expiring - the event is generated when license is about to expire, the even should be sent 3 days prior to expiration
params[]
- exp_time / int / unixtime data when the license expired
{"exp_time": 1587365282}
- expired - the event is generated when license has expired
params[]
- exp_time / int / unixtime data when the license is expired
{"exp_time": 1587365282}
- renewed - the event is generated when the license is updated (renewed)
params[]
- exp_time / int / unixtime data when the license will expire
- license / string / license type
{
  "exp_time": 1587365282,
  "license": "imunify360"
}
- expiring - the event is generated when license is about to expire, the even should be sent 3 days prior to expiration
CLI
The following CLI command is used to manage hooks:
imunify360-agent hook [command] --event [event_name|all] [--path </path/to/hook_script>]
The following commands are supported:
- add - register a new event handler
- delete - unregister existing event handler
- list - show existing event handlers
- add-native - register a new native event handler
The third parameter event_name defines a particular event that invokes a registered handler as opposed to all keyword. The fourth parameter /path/to/hook_script shall contain a valid path to a handler of the event, it shall be any executable or Python Native event handlers that agent will run upon a registered event.
Native
Native hook is a script written on Python 3.5 and allows to quickly process events. The Python file should contain only one method that customer would implement:
def im_hook(dict_param):
  …
  pass
where dict_param would hold the same data as JSON that non-Native hook would get.
Log File
You can see all hook data in the log file. It is located at /var/log/imunify360/hook.log . When the event comes, the data is recorded to the log file in the following format:
timestamp event : id : started [native:] name : subtype : script_path
- native is prepended for the Native hook implementation
- id is a unique ID for each event
Once the listener is done, the data is recorded to the log file in the following format:
timestamp event : id : done [native:] script_path [OK|ERROR:code]
In case of an error, you can see the error code you have specified.
Structure and examples of a hook script
Regular (non-native) hook:
#!/bin/bash

data=$(cat)

event=$(jq -r '.event' <<< ${data})
subtype=$(jq -r '.subtype' <<< ${data})

case ${event} in
    malware-scanning)
        case ${subtype} in
            started)
                # do stuff here
            ;;
            *)
                echo "Unhandled subtype: ${subtype}" 1>&2
                exit 1
        esac
        ;;
    *)
        echo "Unhandled event: ${event}/${subtype}" 1>&2
        exit 2
esac
Native hook:
def im_hook(dict_param):
   event = dict_param['event']
   subtype = dict_param['subtype']

   if event == 'malware-scanning':
       if subtype == 'started':
           # do stuff here
           pass
       elif subtype == 'finished':
           # do other stuff here
           pass
       else:
           raise Exception('Unhandled subtype {}'.format(subtype))
   else:
       raise Exception('Unhandled event {}'.format(event))